
# Annotate
The current version of hapyteam only supports comments or previews of jpg, jpeg, png, pdf, svg, pyz, and dwg format files. Other formats are not supported temporarily
# 1.Picture Annotate
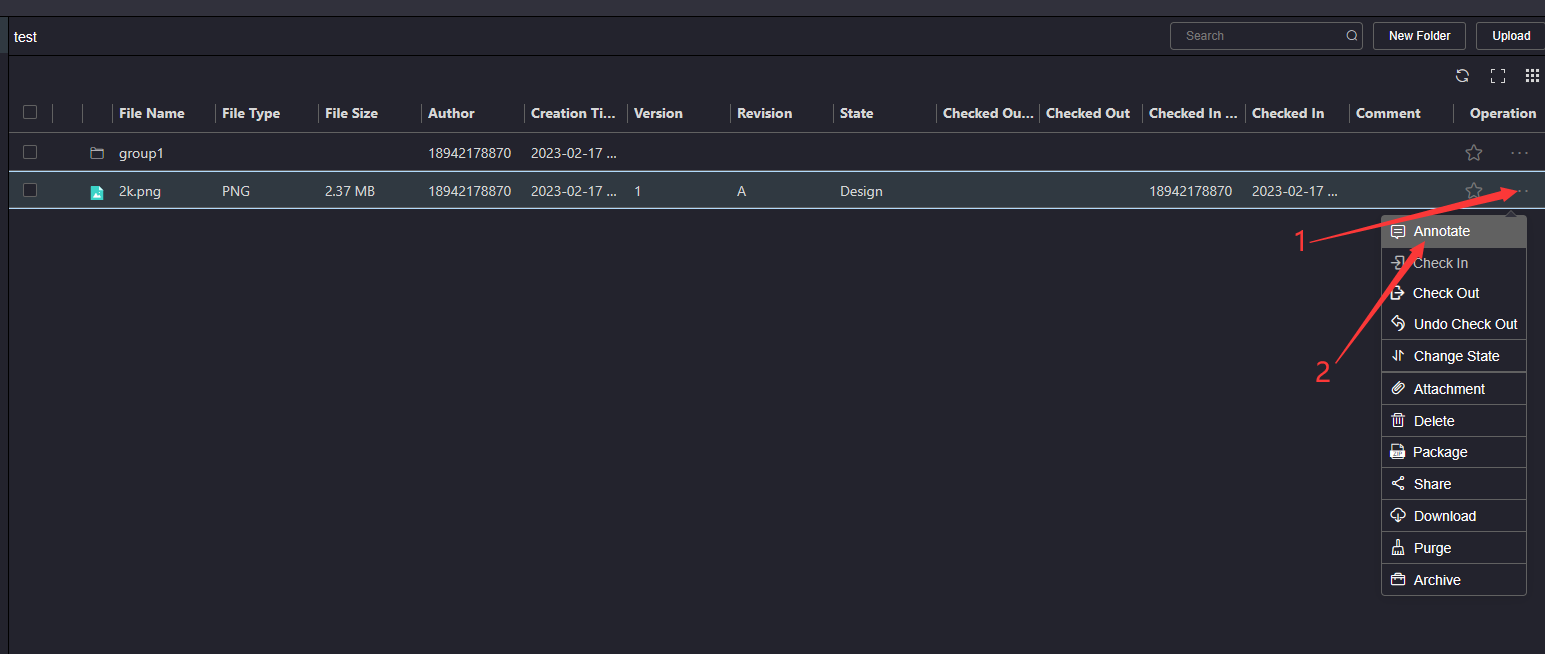
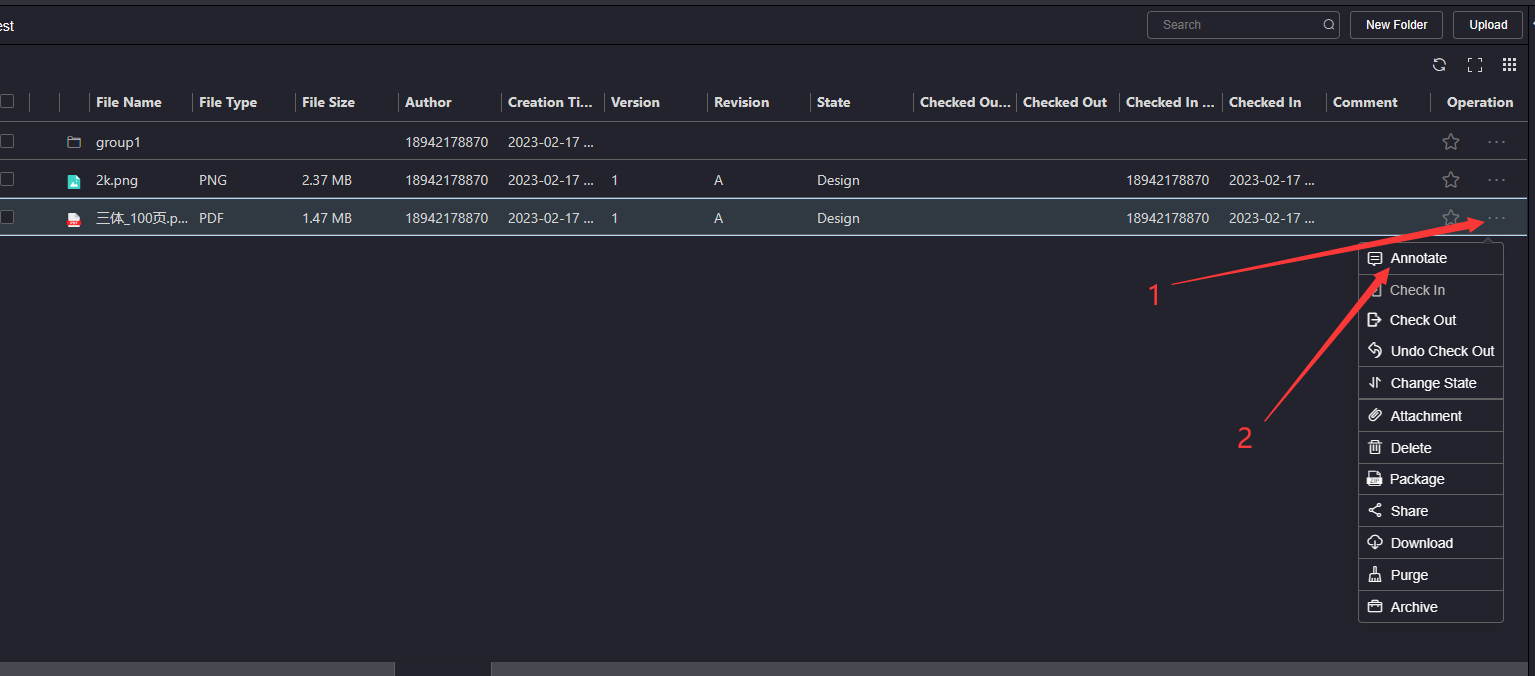
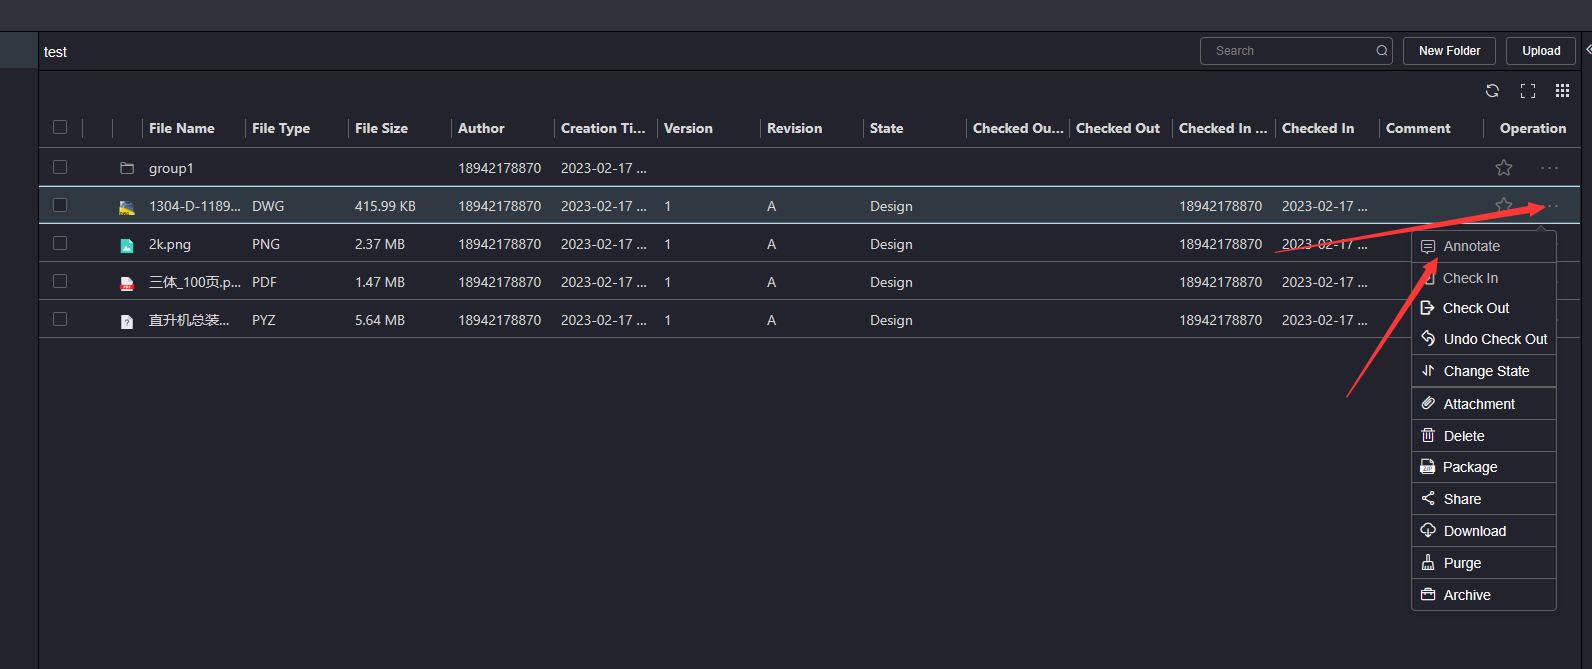
Click the More Operations button in the operation column on the left side of the document to pop up the operation list. Click the Annotate button to jump to the picture Annotate page
On the annotation page, you can adjust the size of the image by sliding the mouse wheel, or by clicking the left mouse button and dragging the image
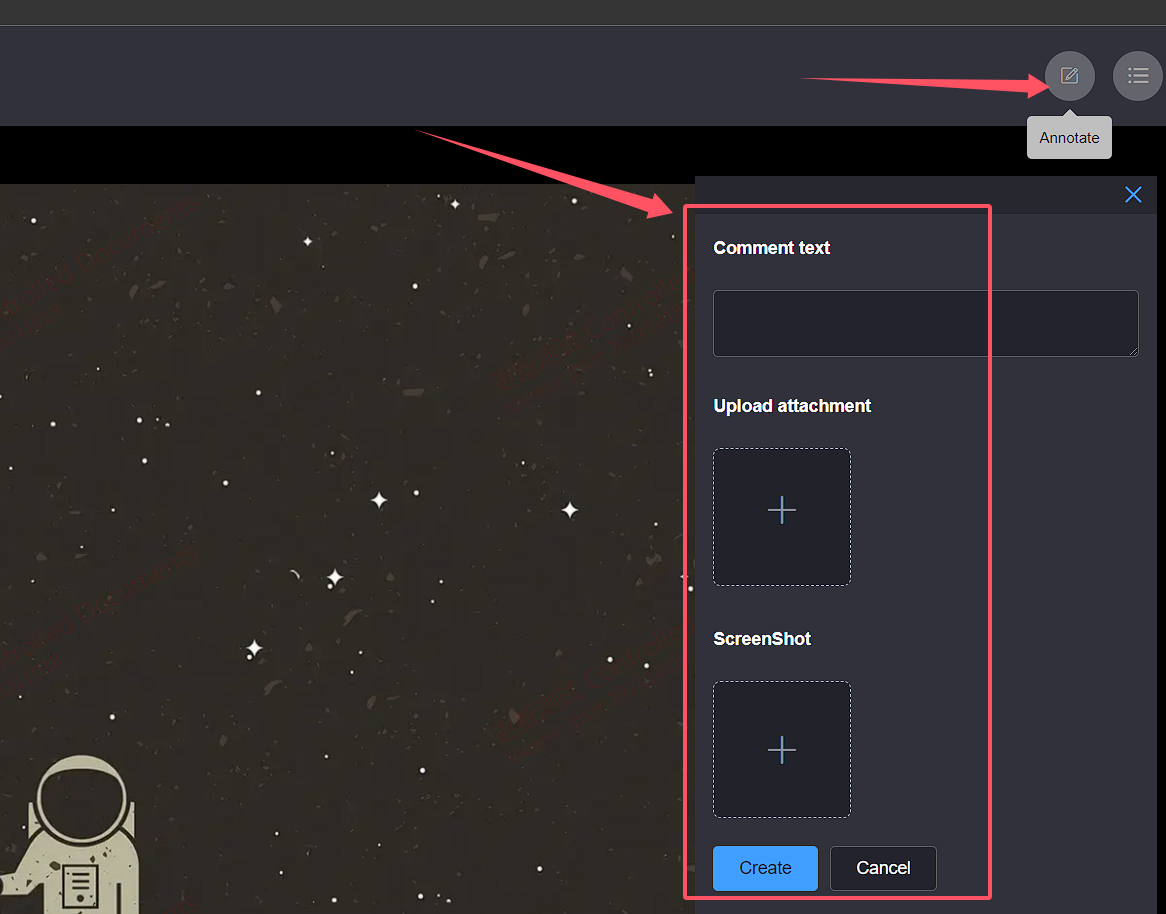
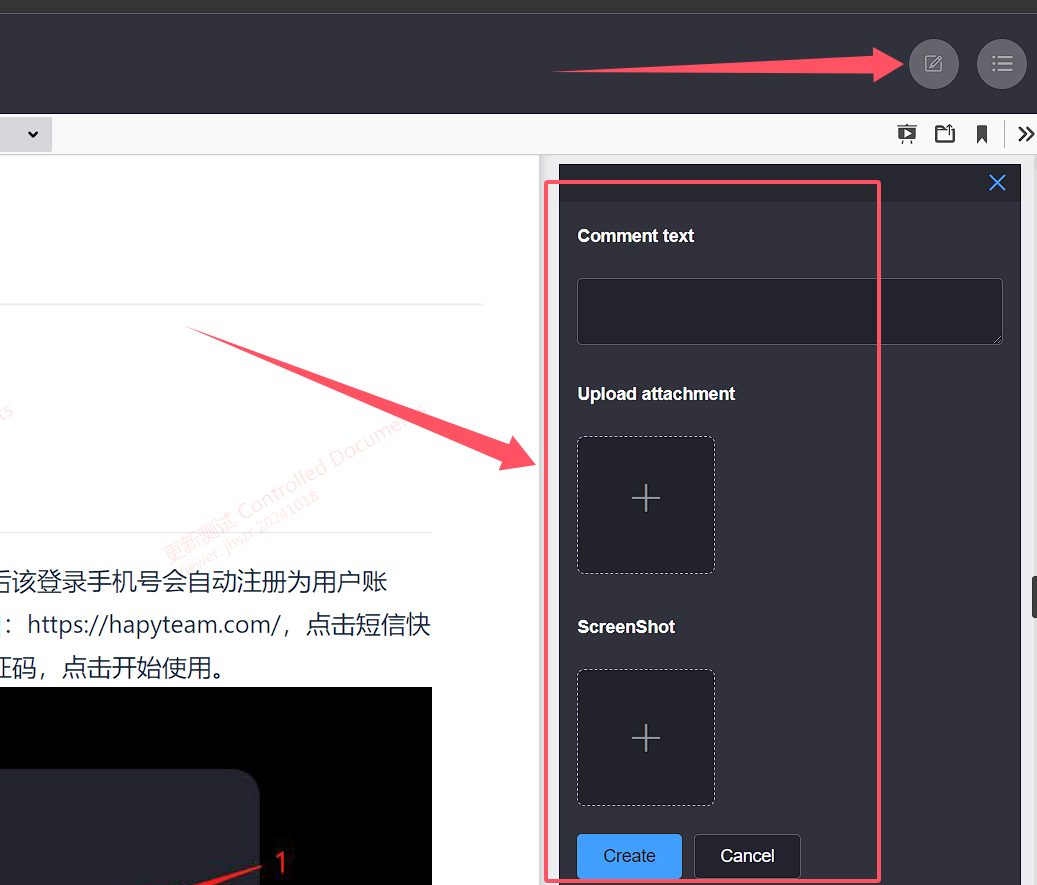
Click the Circle Annotation button at the top right of the circle annotation page to open the Create Annotation interface
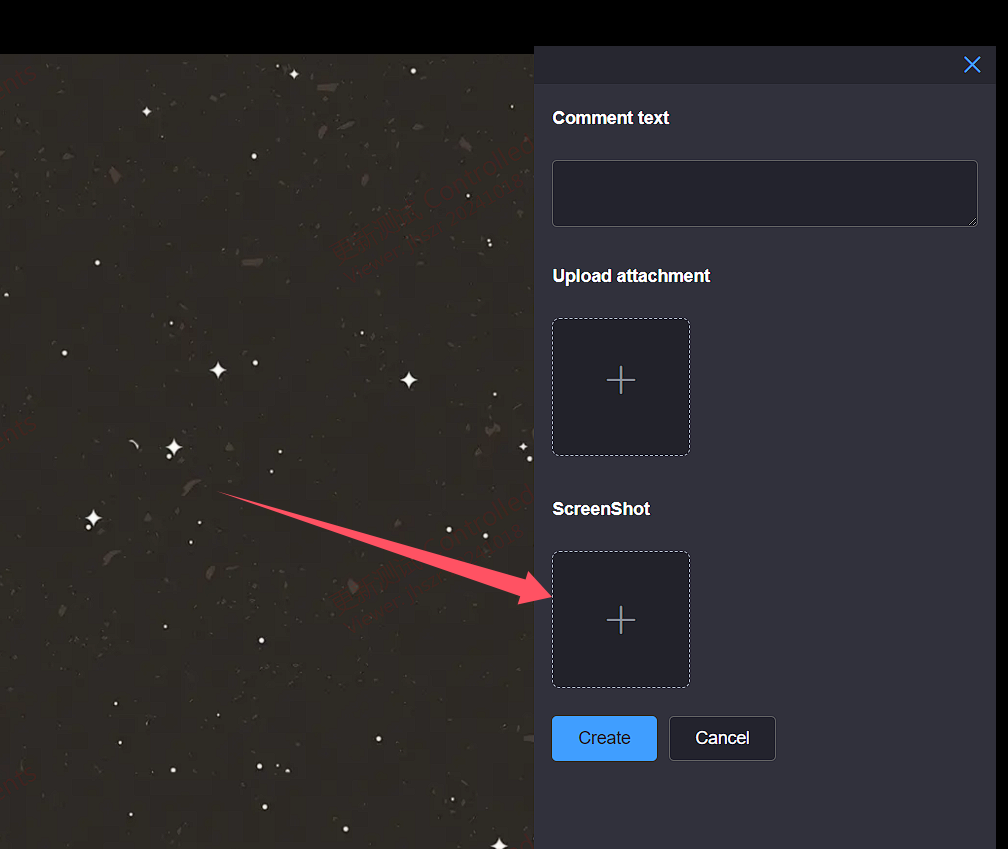
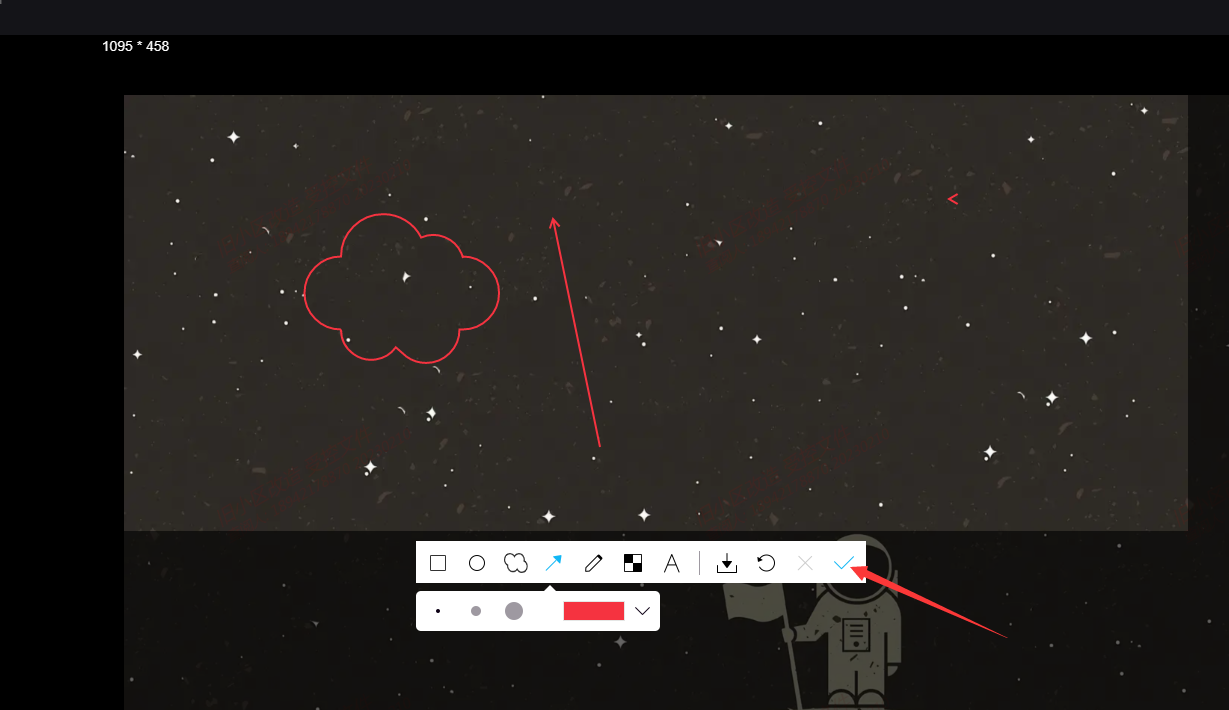
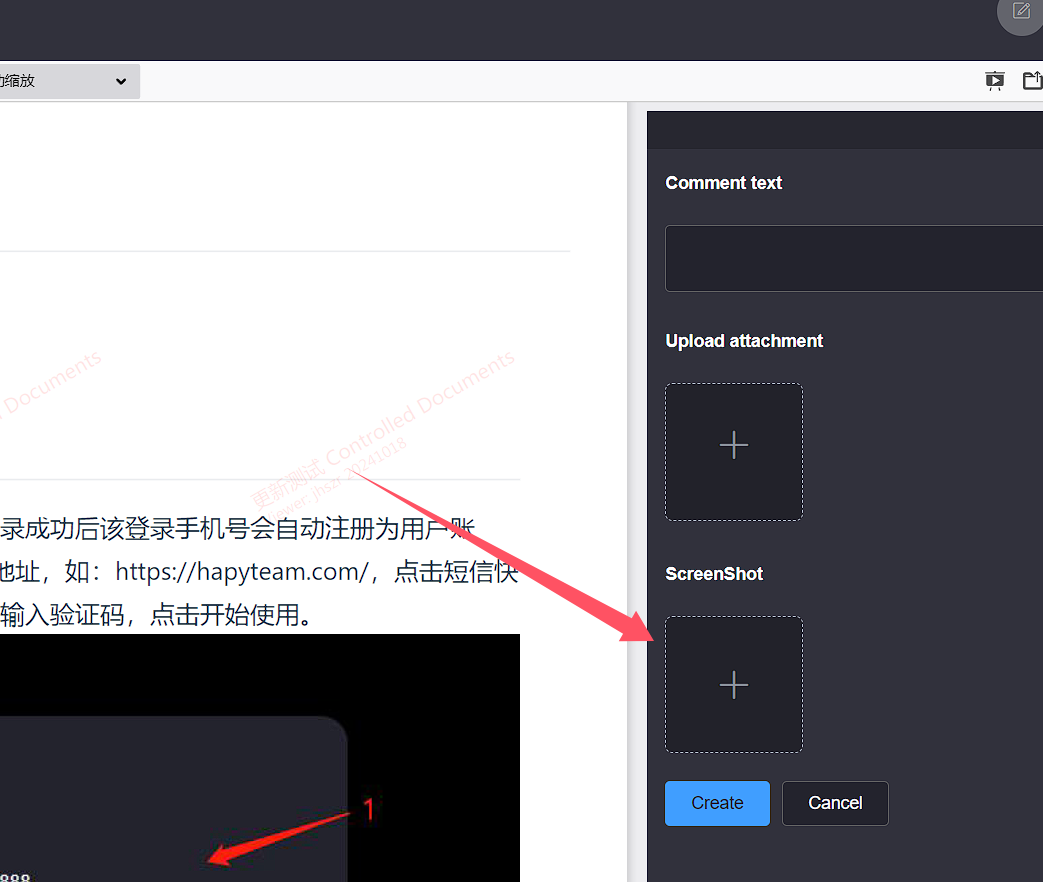
In the Create Annotation interface, click the Screenshot button to enter the annotation status
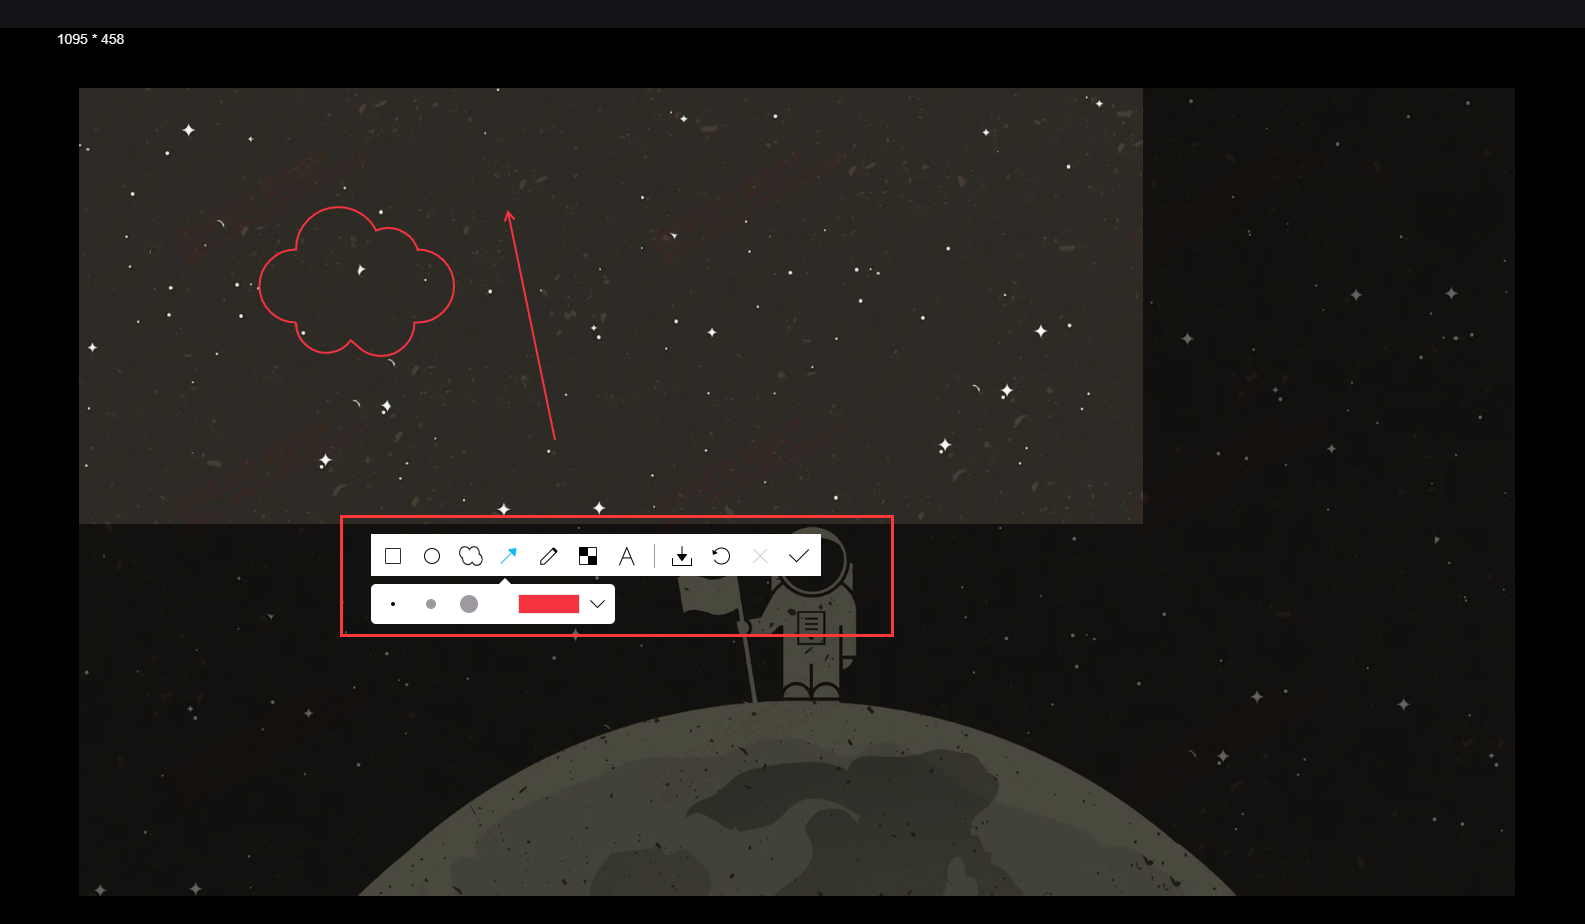
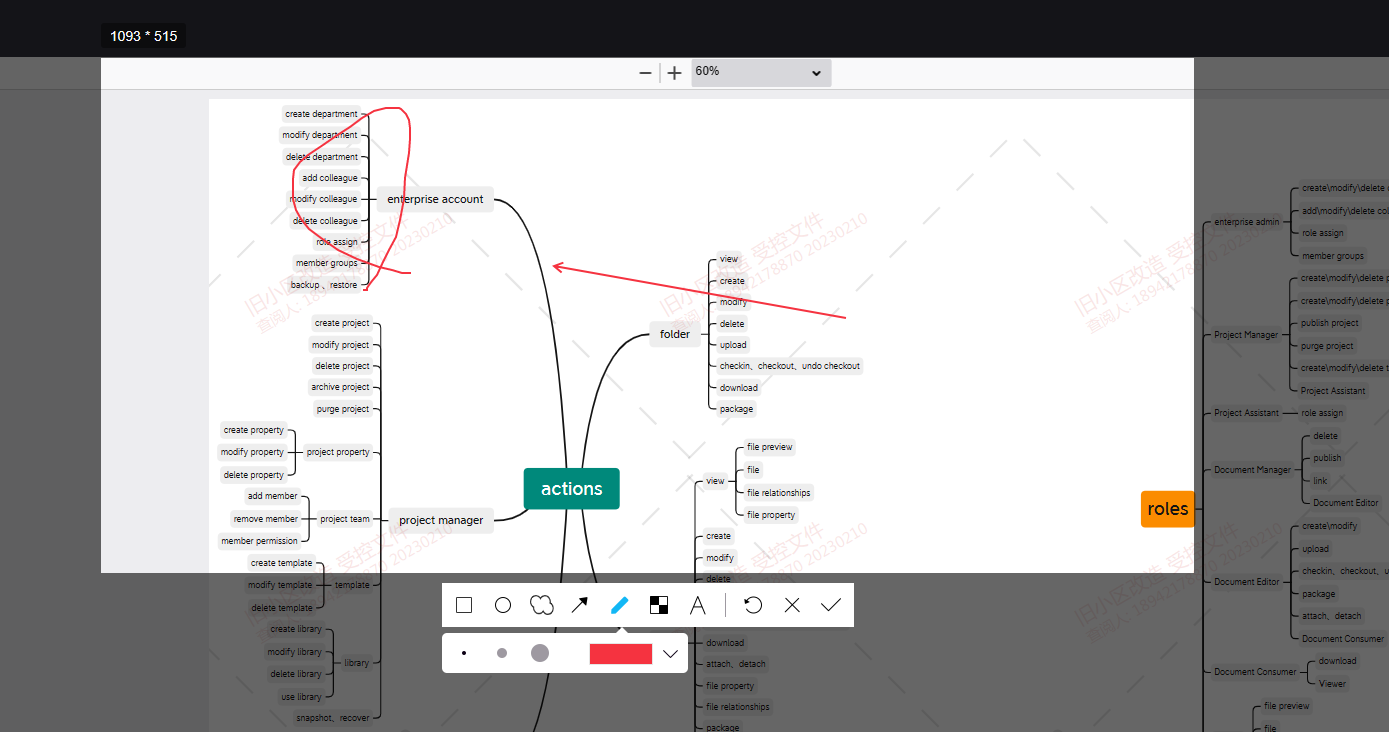
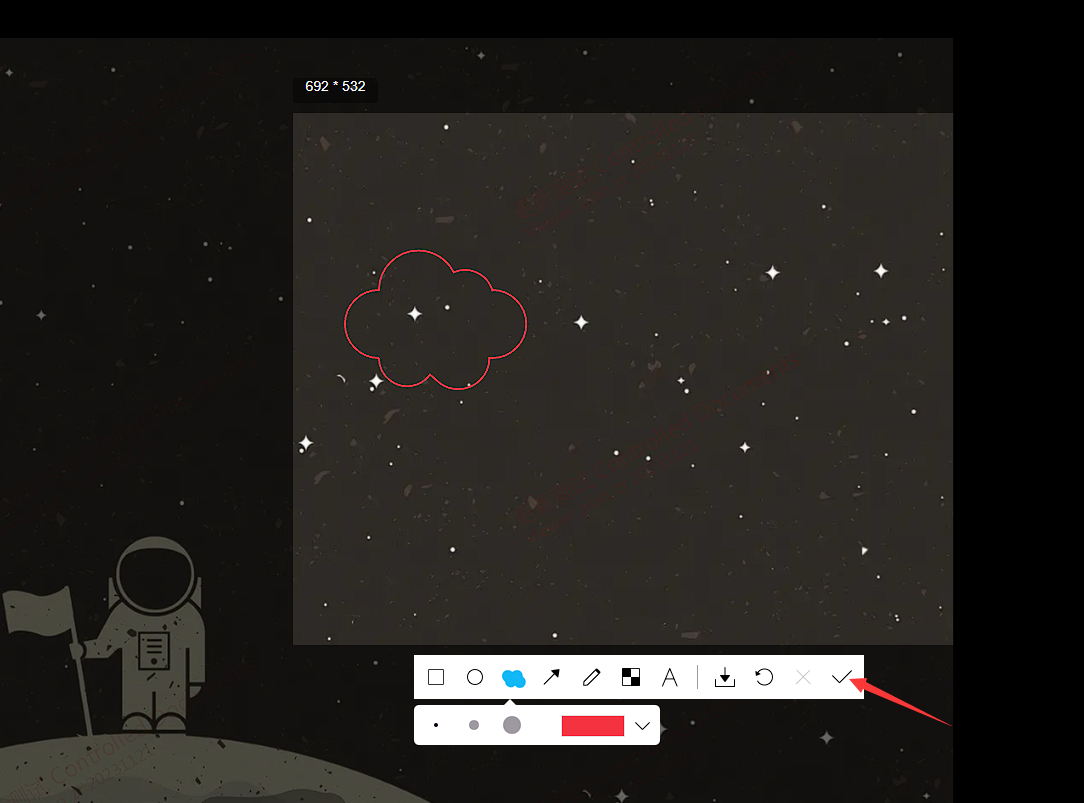
After dragging the mouse to select the circle annotation range, you can select a brush in the lower toolbar to annotate or mark the circle annotation range
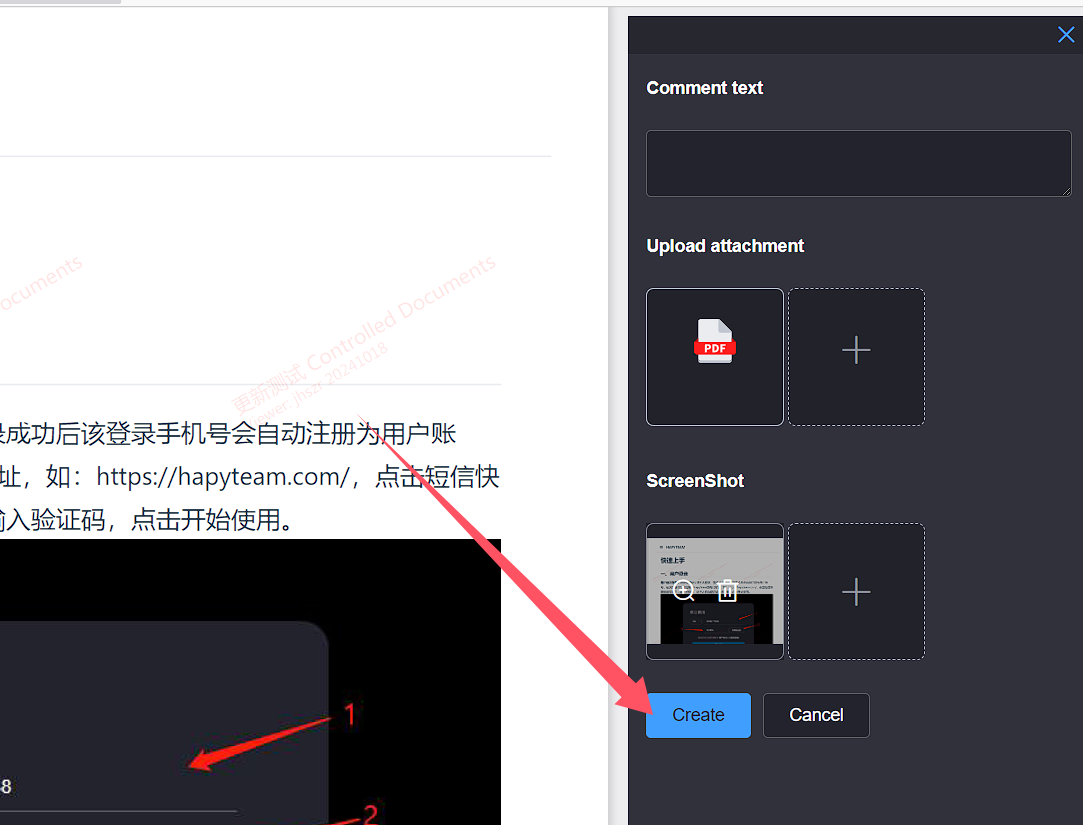
After the annotation mark is completed, You can view annotated images on the annotation creation interface
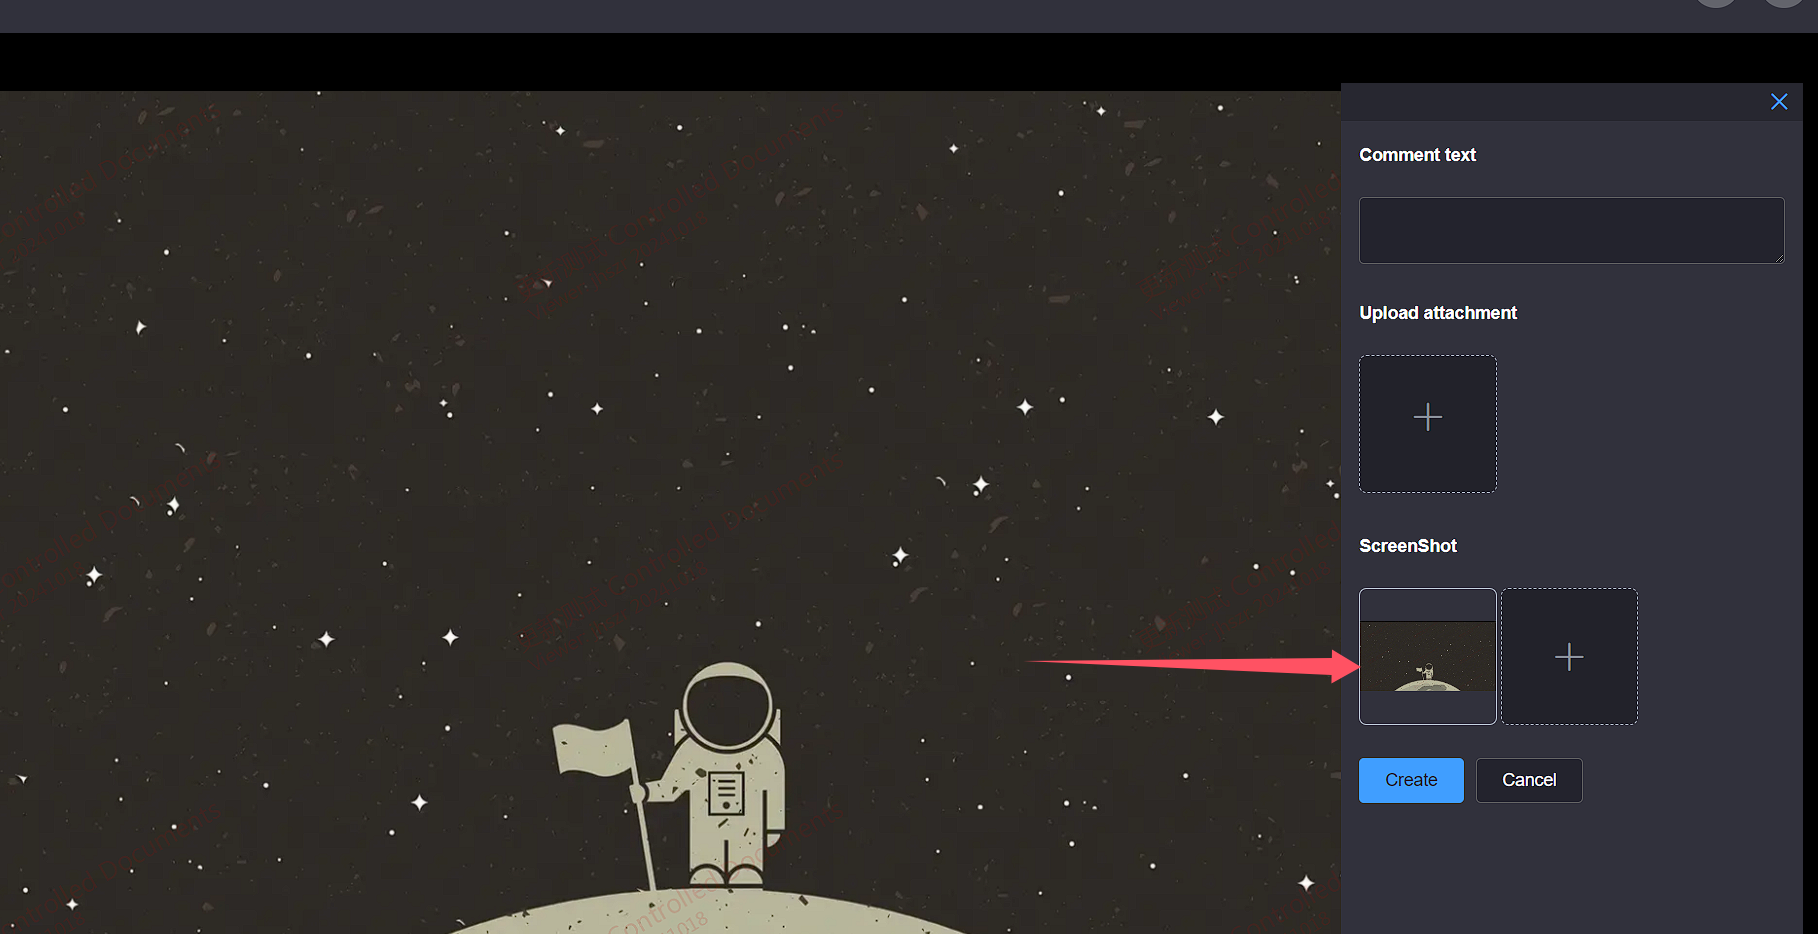
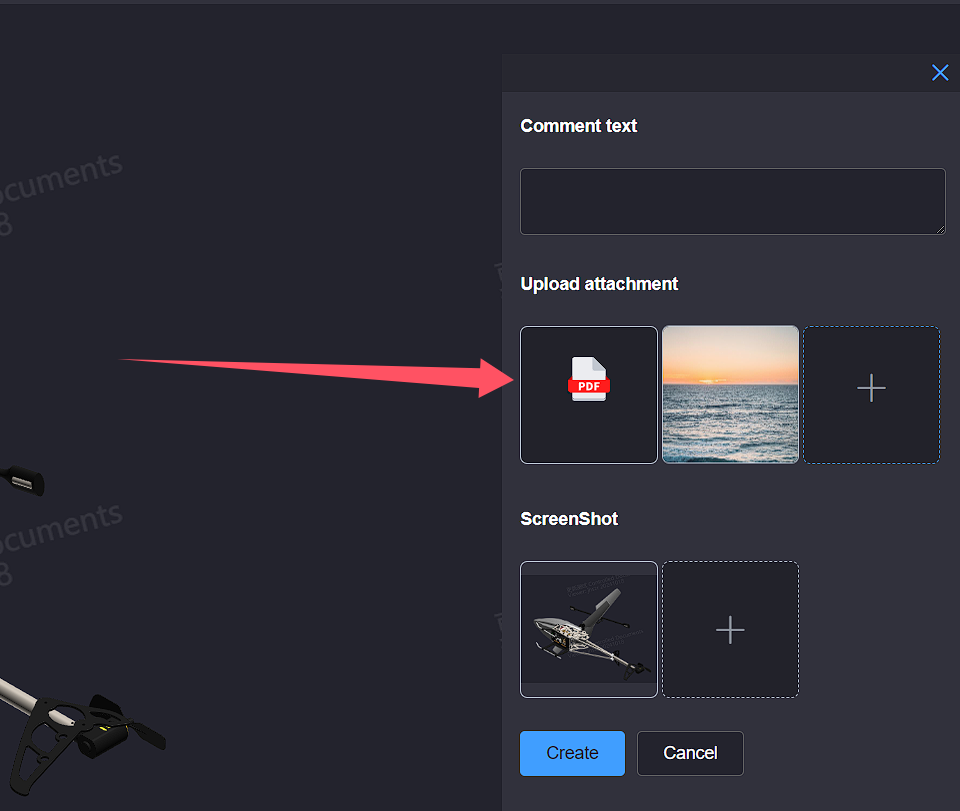
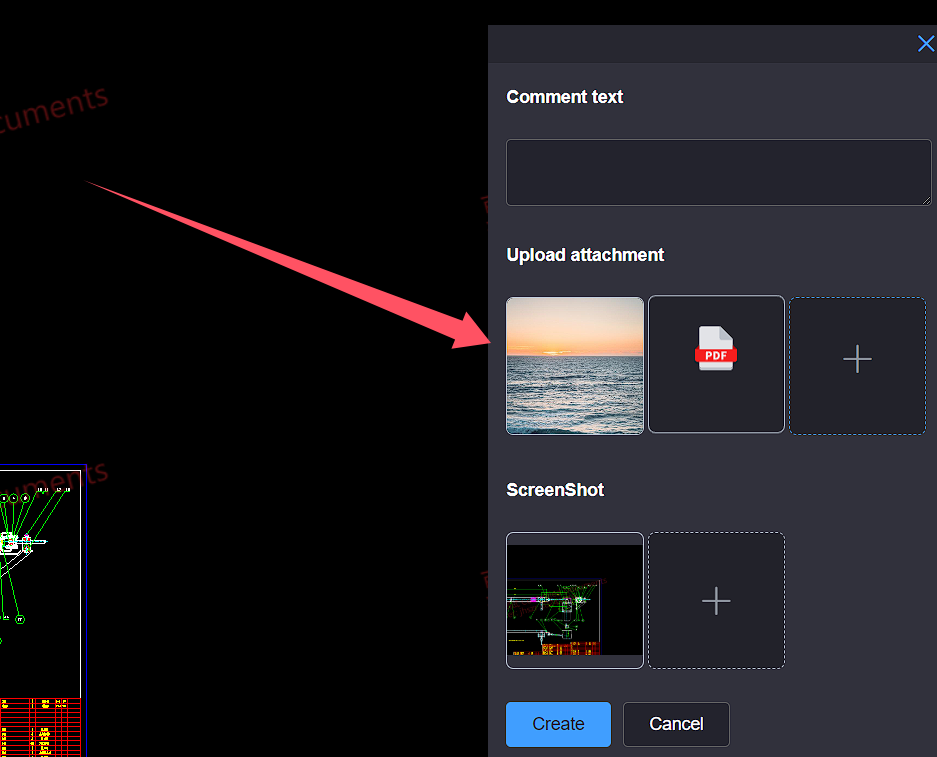
Click the Upload attachment button, select the attachment to upload, and you can view the selected attachment in the comment creation interface

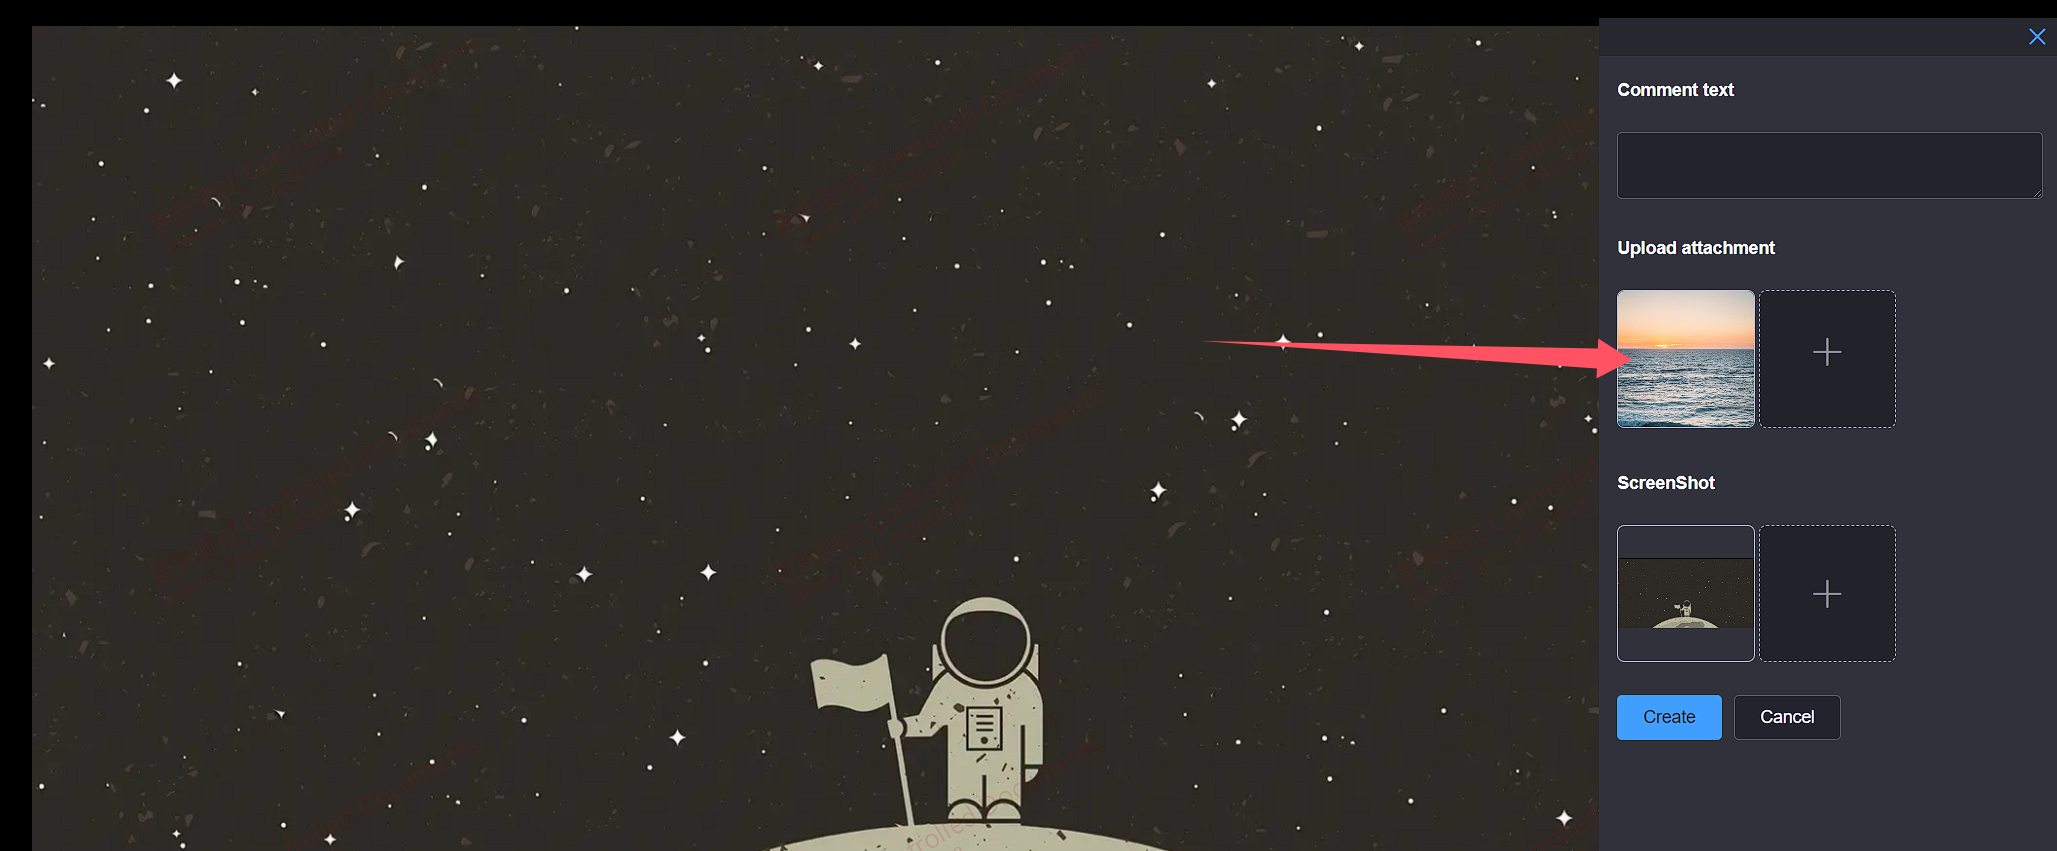
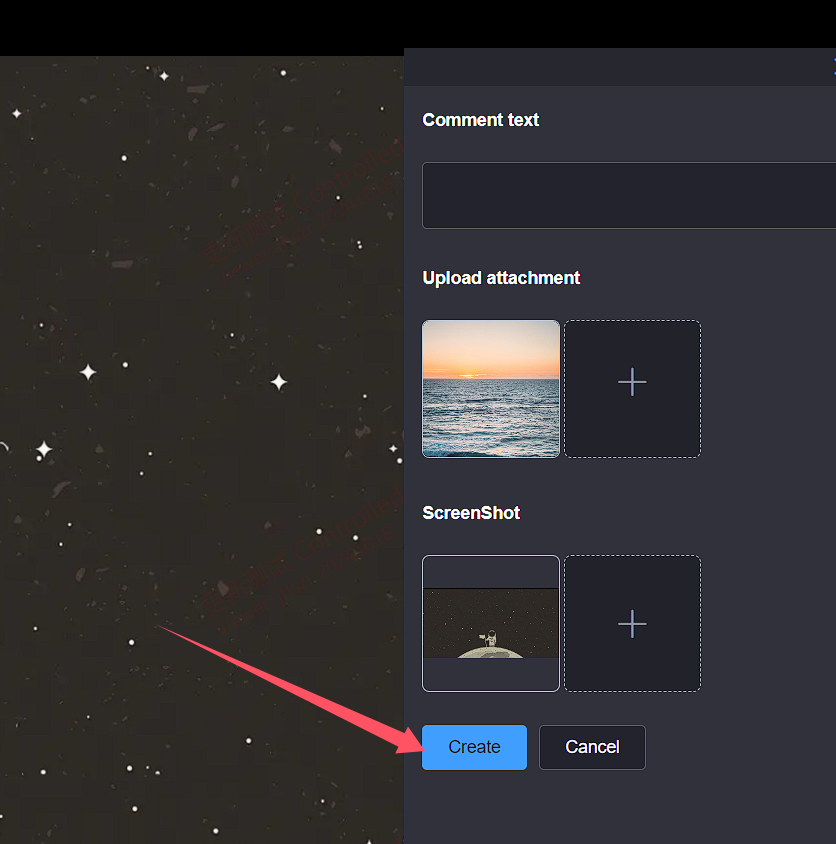
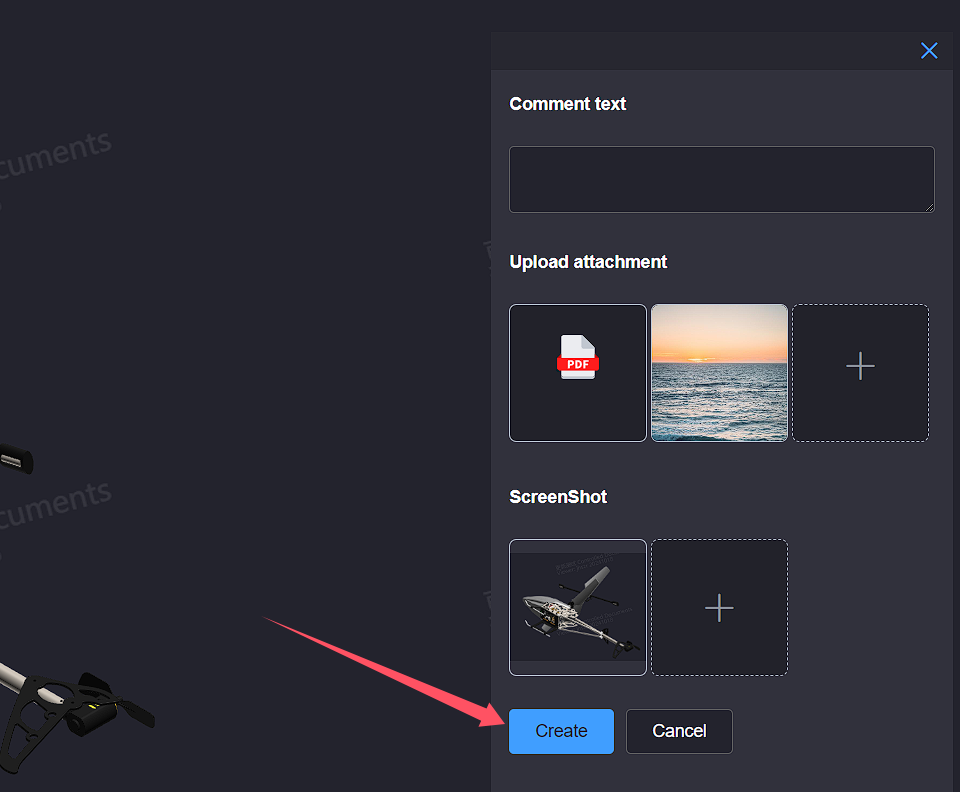
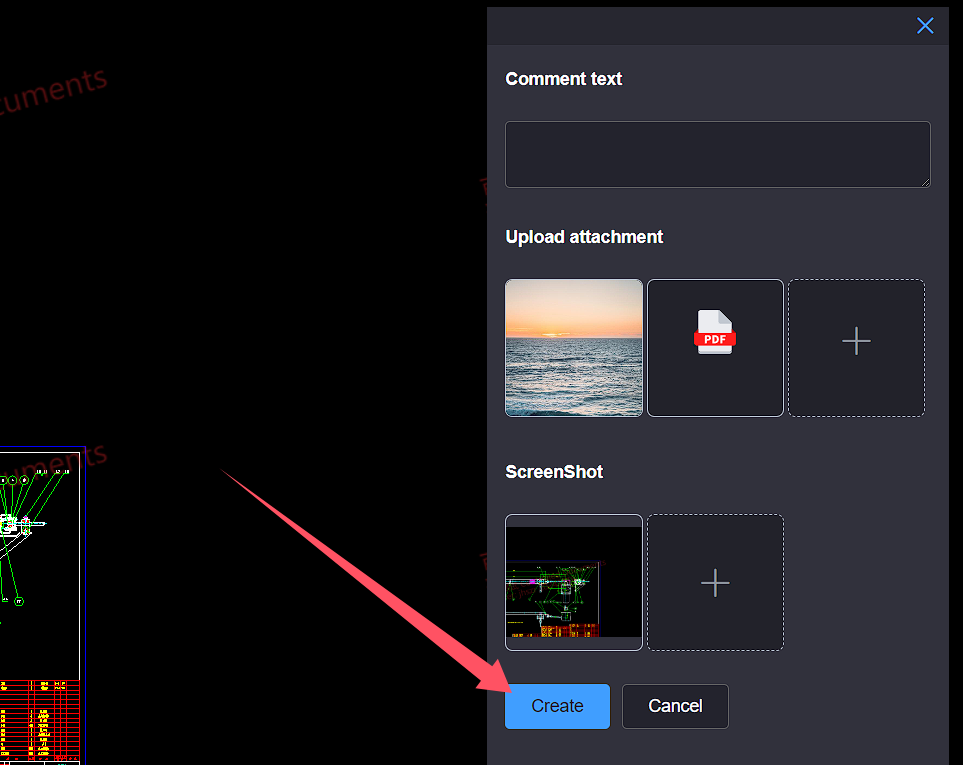
After entering the annotation text, click the Create button and wait for the annotation to be created
When creating annotations, the total number of uploaded attachments and created screenshots cannot exceed 9
# 2.Pdf Annotate
Click the More Operations button in the operation column on the left side of the document to pop up the operation list. Click the Annotate button to jump to the pdf Annotate page
Enter the pdf circle annotation page, you can click the toolbar at the top right to zoom the pdf view size, click the toolbar at the top left to switch the pdf page or search the pdf page, and click the toolbar at the top right to switch the pdf browsing mode

Click the Circle Annotation button at the top right of the circle annotation page to open the Create Annotation interface
In the Create Annotation interface, click the Screenshot button to enter the annotation status
After the annotation mark is completed, You can view annotated images on the annotation creation interface

Click the Upload attachment button, select the attachment to upload, and you can view the selected attachment in the comment creation interface


After entering the annotation text, click the Create button and wait for the annotation to be created
When creating annotations, the total number of uploaded attachments and created screenshots cannot exceed 9
# 3.3D model file Annotate
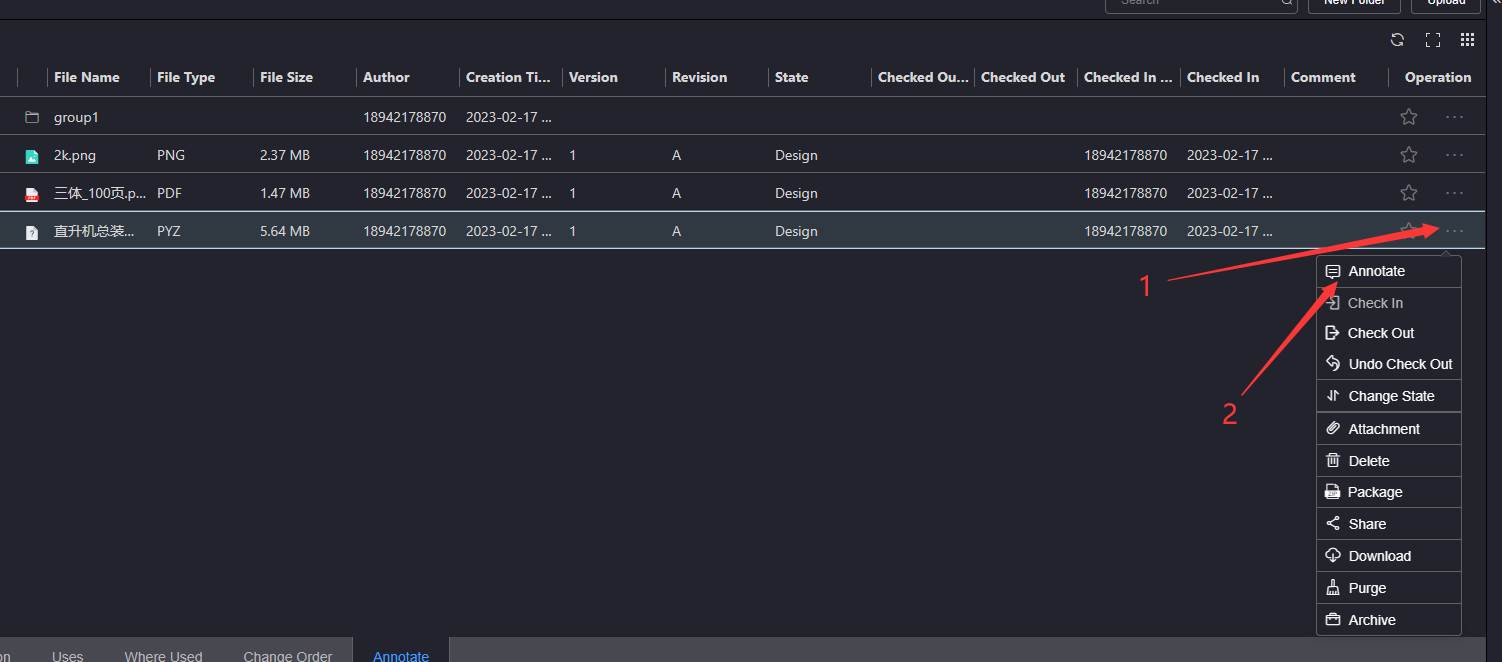
Click the More Operations button in the operation column on the left side of the file to pop up the operation list. Click the Annotate button to jump to the pyz Annotate page
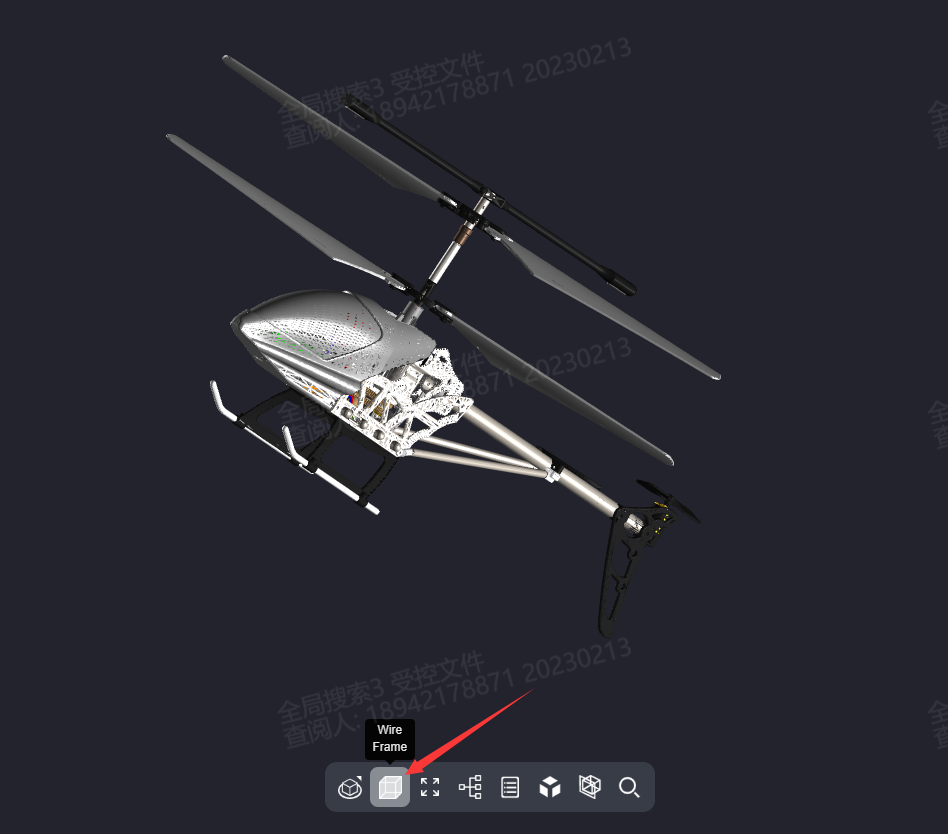
Enter the pyz circle annotation page, click the first button on the lower toolbar to switch the model direction
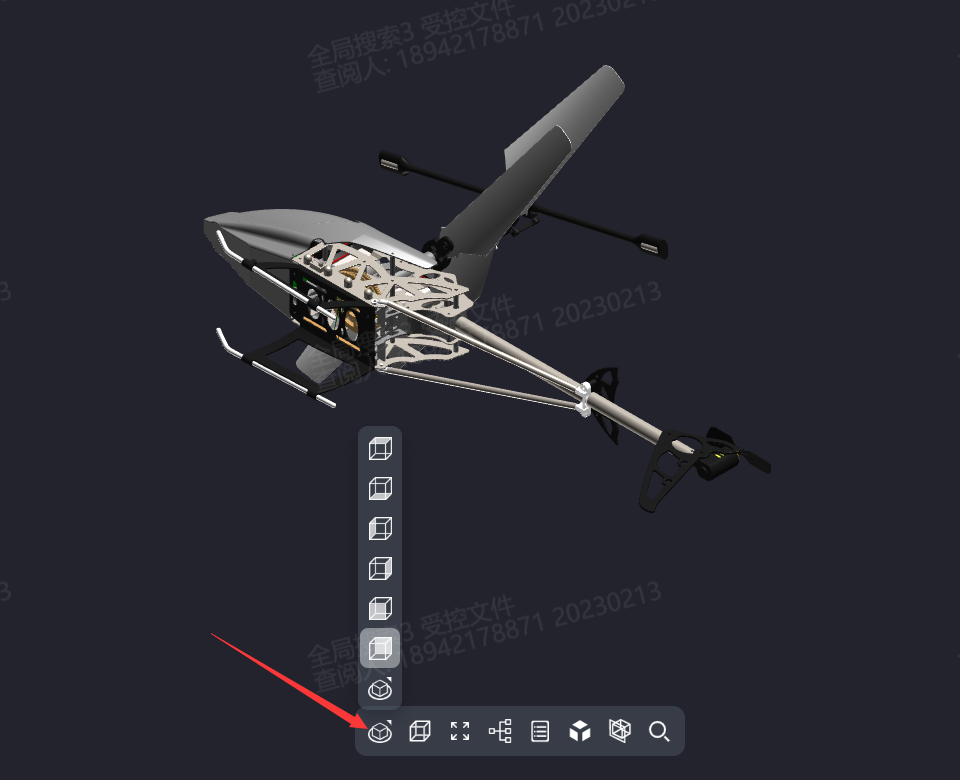
Click the second button on the lower toolbar to switch the model panel
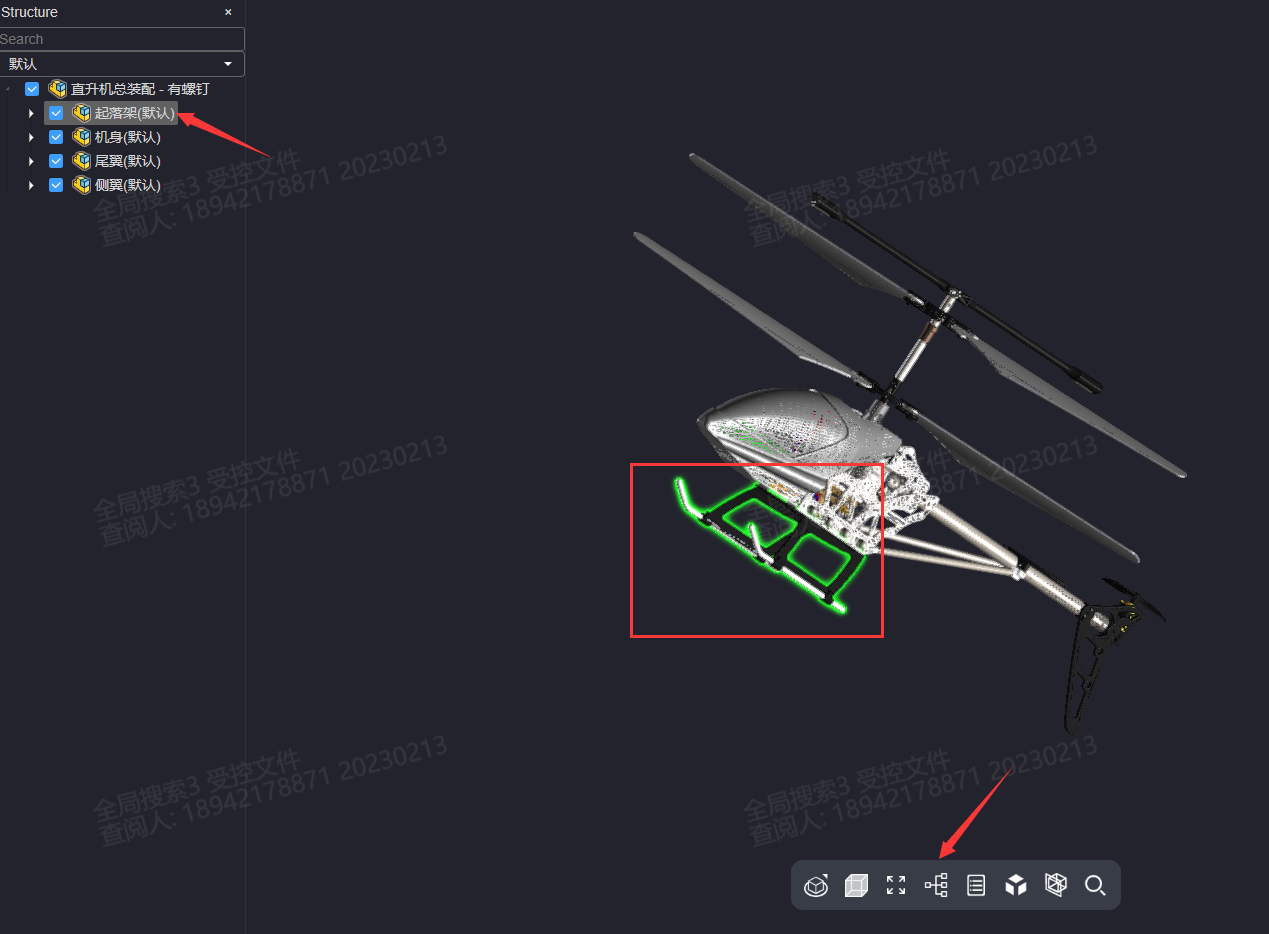
Click the third button on the lower toolbar to view the model in full screen Click the fourth button on the lower toolbar to view the component tree of the current model. Click the node of the component tree, and the corresponding component on the model will be selected
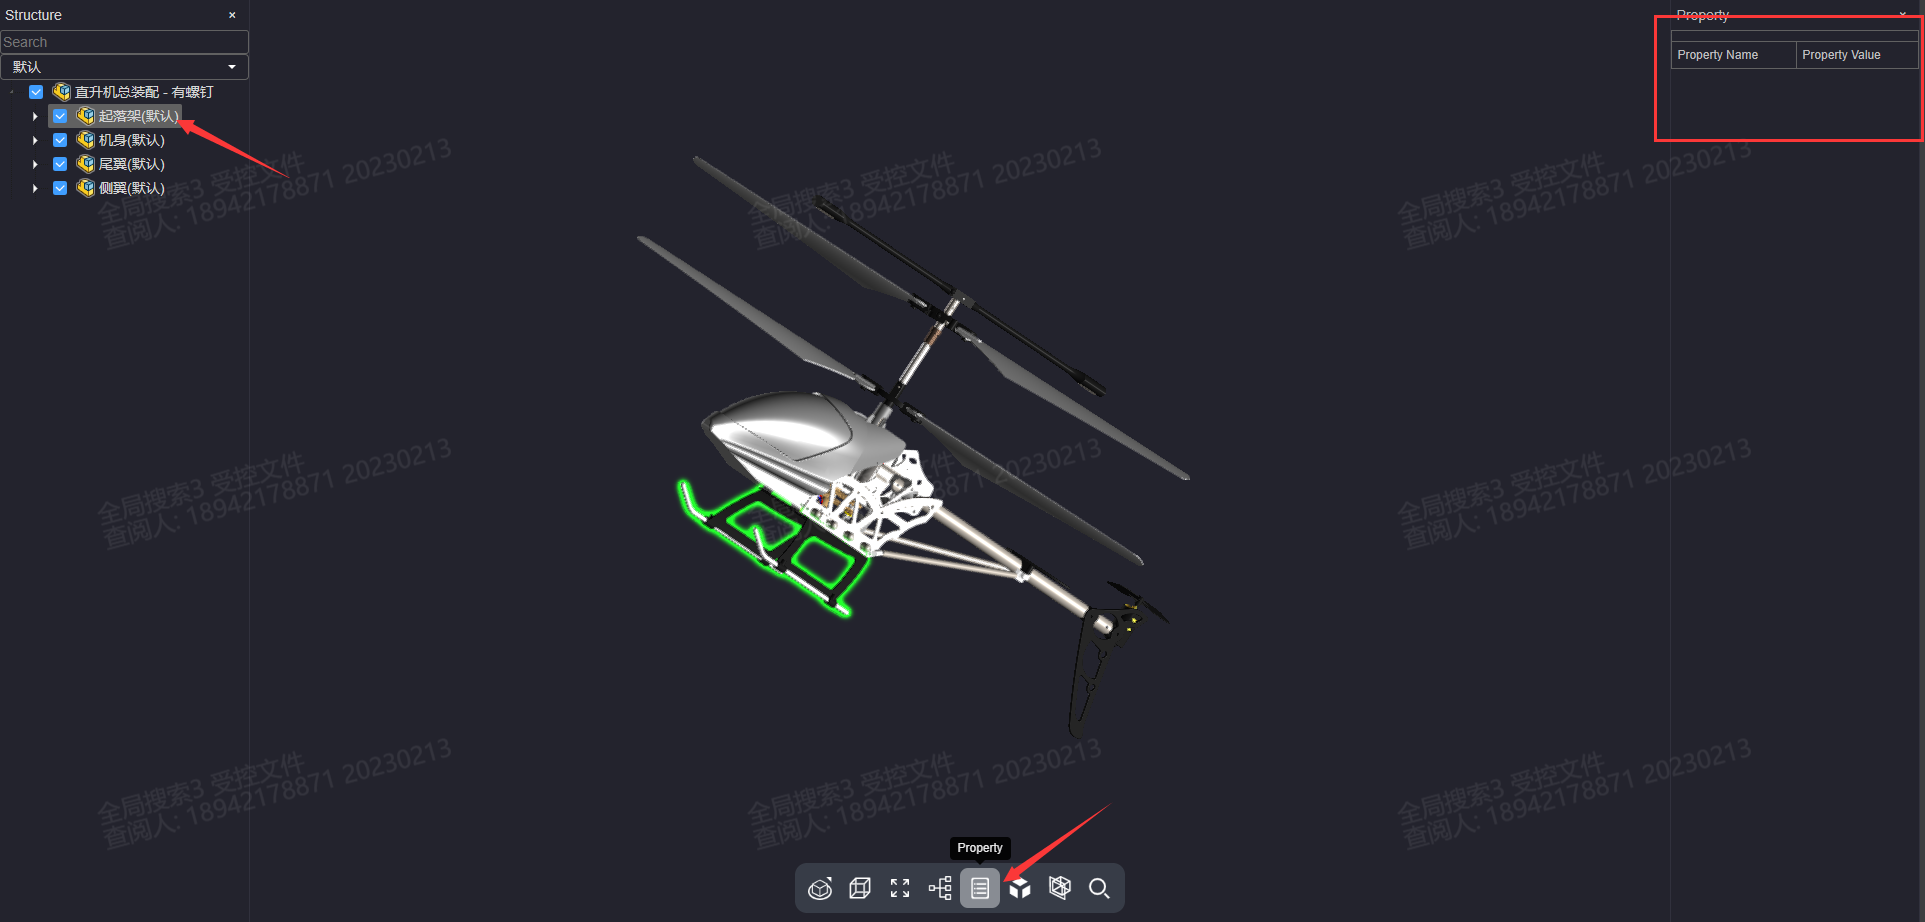
Click the fifth button on the lower toolbar to view the properties of the model component. Click the node in the component tree on the left, and the properties of the corresponding component will be displayed in the attribute list on the right
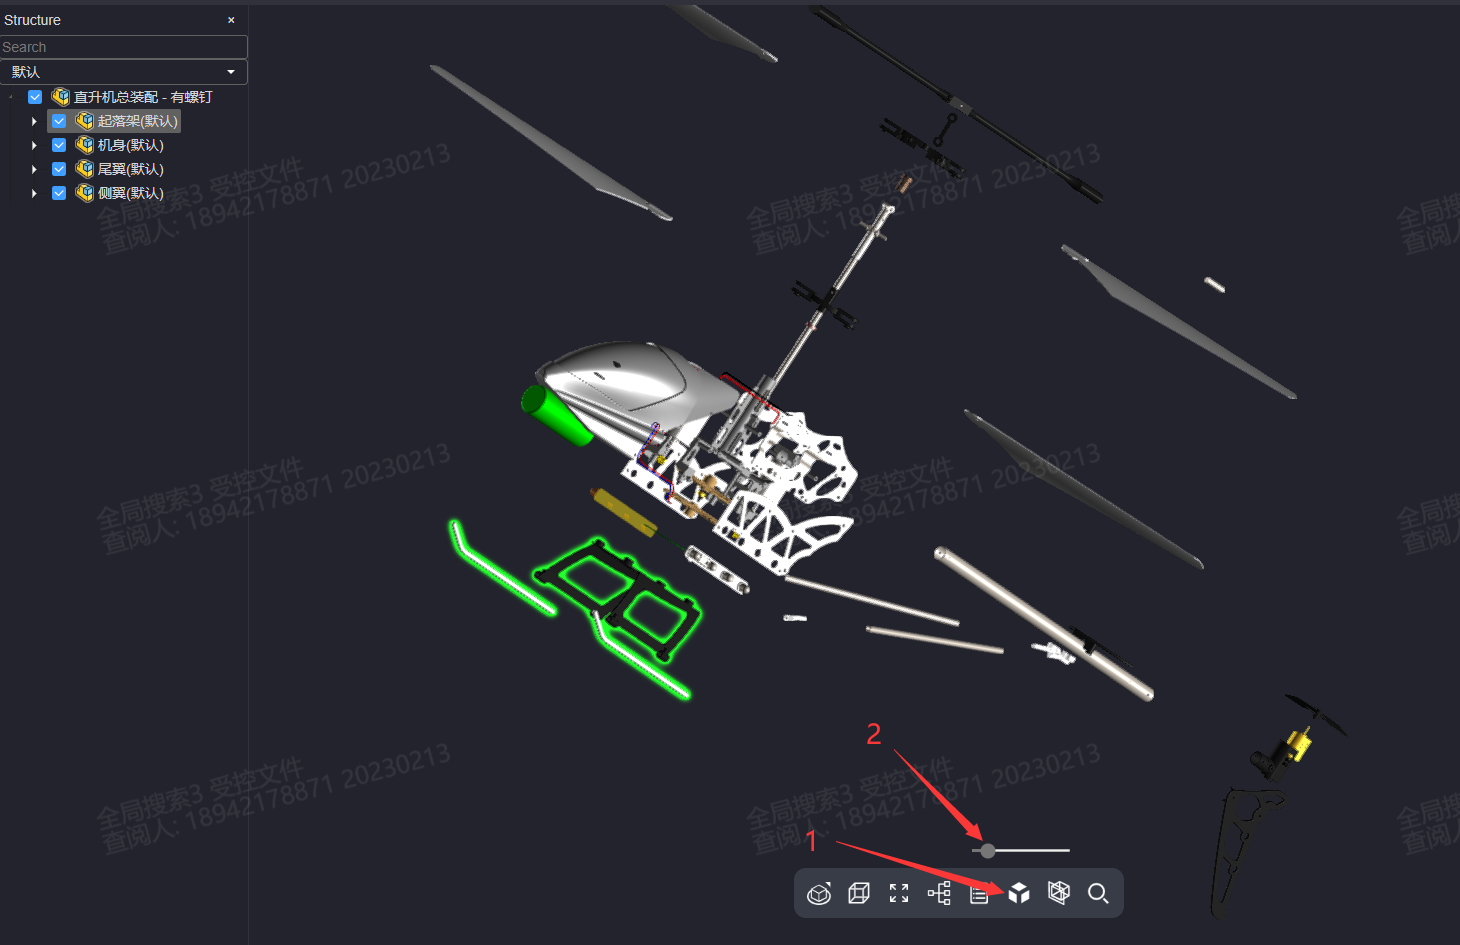
Click the sixth button on the lower toolbar, and the model will be in an explosive state. You can observe each component of the model
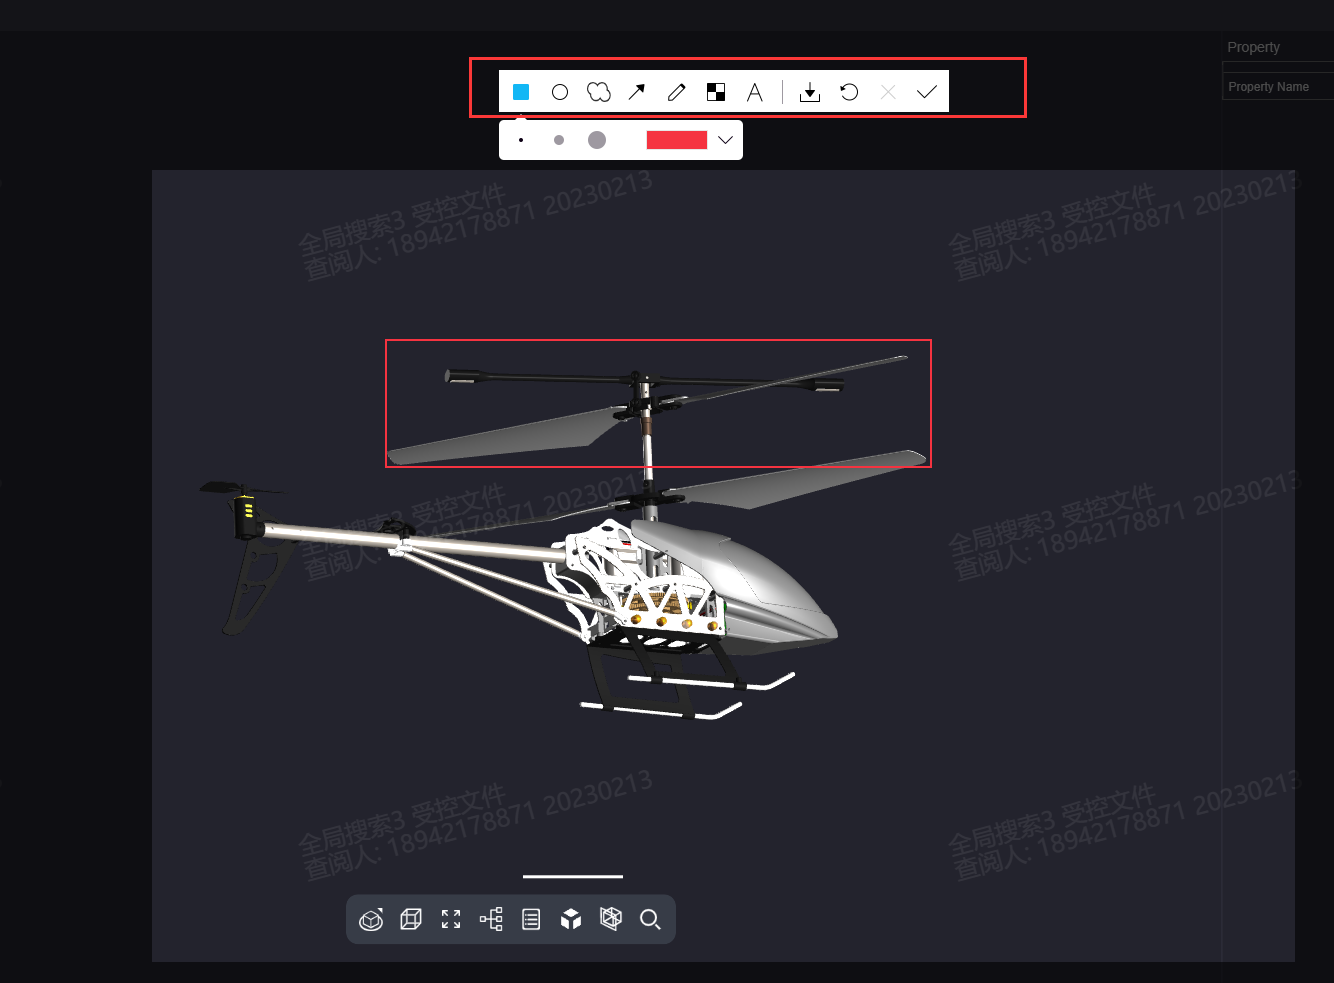
Click the Circle Annotation button at the top right of the circle annotation page to open the Create Annotation interface

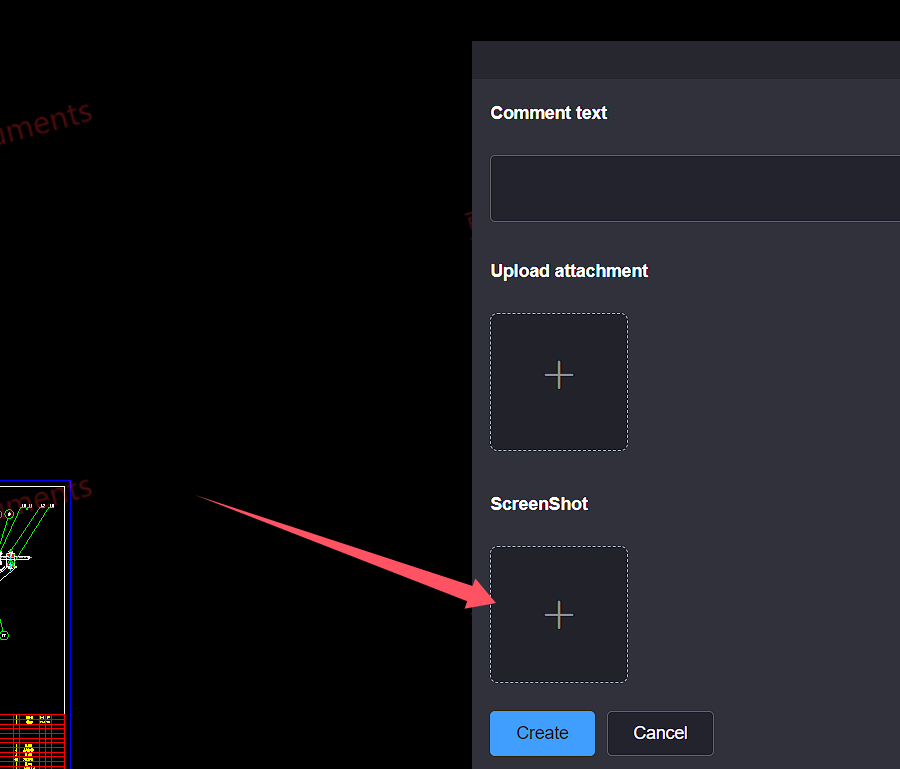
In the Create Annotation interface, click the Screenshot button to enter the annotation status
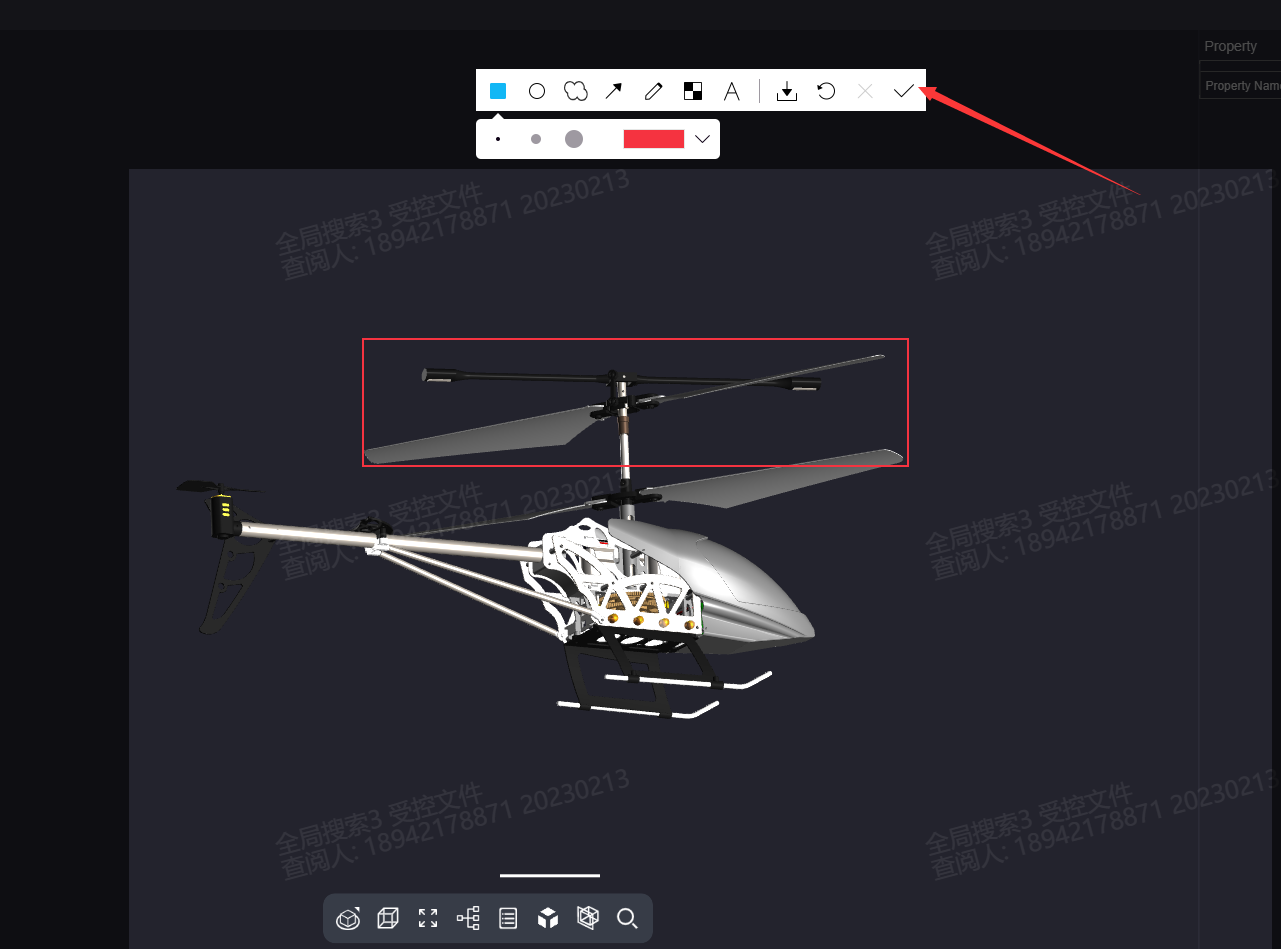
After dragging the mouse to select the circle annotation range, you can select a brush in the lower toolbar to annotate or mark the circle annotation range
After the annotation mark is completed, You can view annotated images on the annotation creation interface
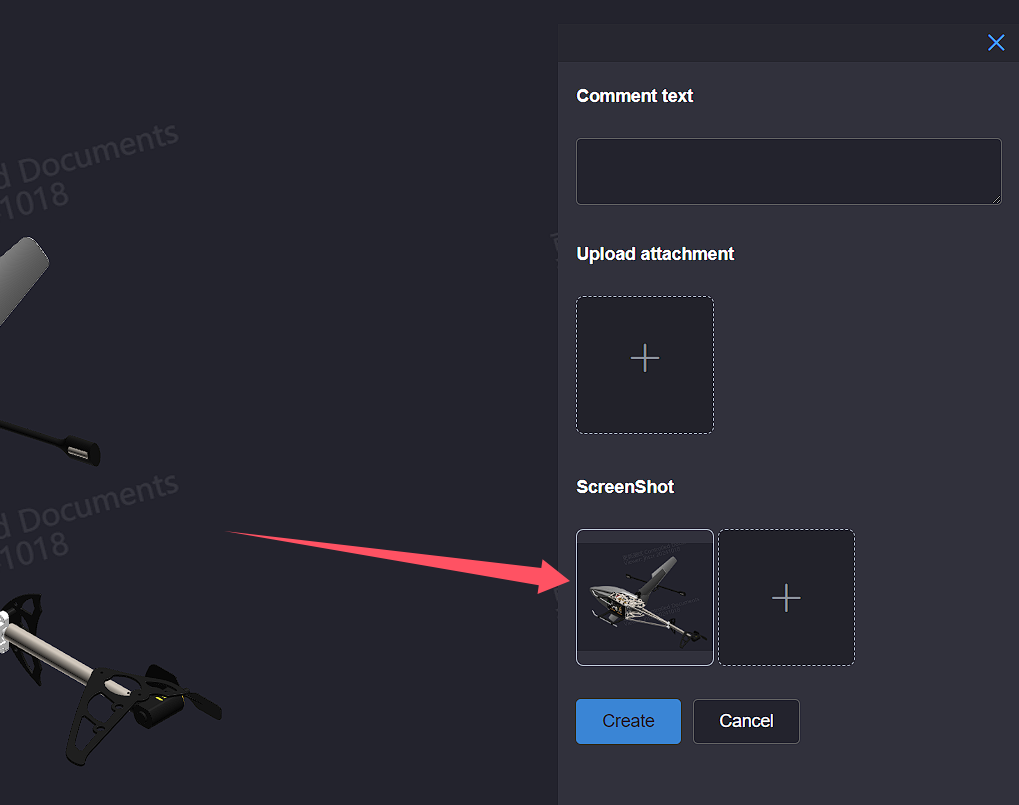
Click the Upload attachment button, select the attachment to upload, and you can view the selected attachment in the comment creation interface
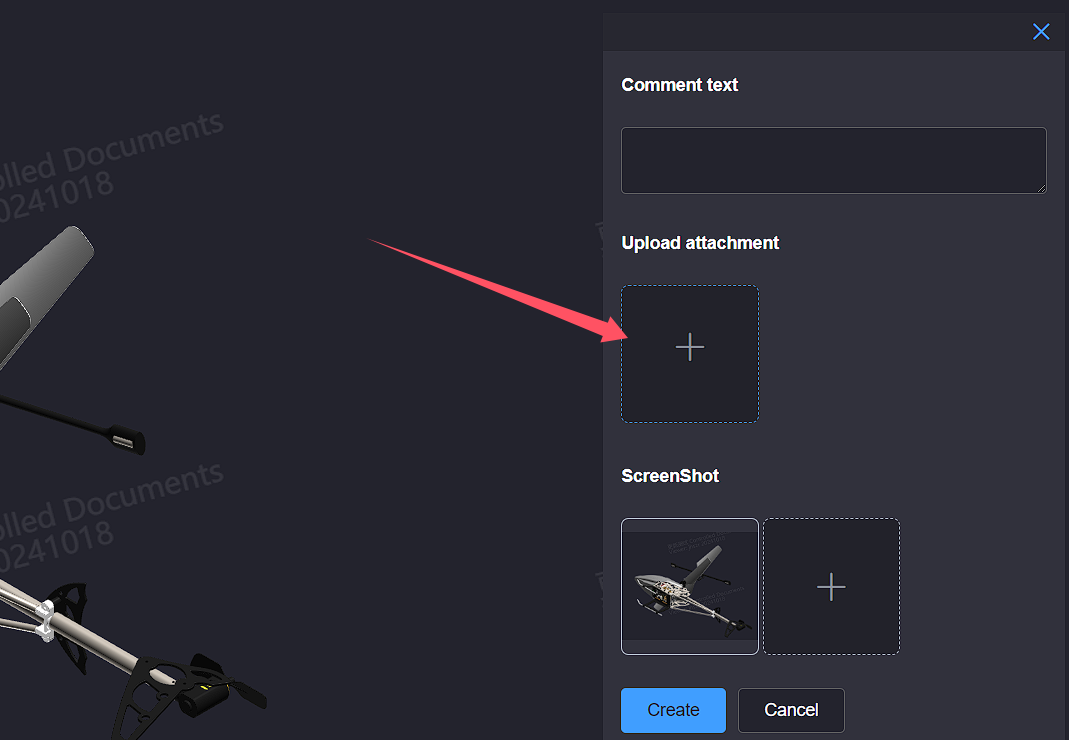
After entering the annotation text, click the Create button and wait for the annotation to be created
When creating annotations, the total number of uploaded attachments and created screenshots cannot exceed 9
# 4.Dwg file Annotate
Only dwg files uploaded on the client can be annotated
Click the More Operations button in the operation column on the right side of the file to pop up the operation list. Click the Annotate button to jump to the dwg Annotate page
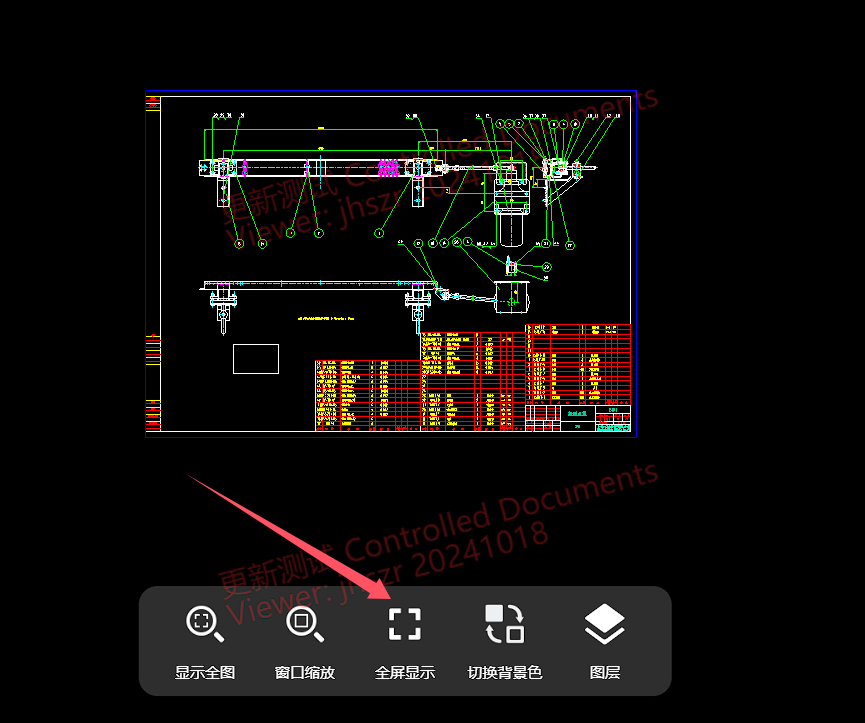
Enter the dwg circle annotation page, click the Show full picture button on the Below toolbar, and the file will be automatically centered and enlarged

Enter the dwg circle annotation page, click the zoom button in the Below toolbar window, select the zoom range, release the mouse, and the selected range will be automatically enlarged
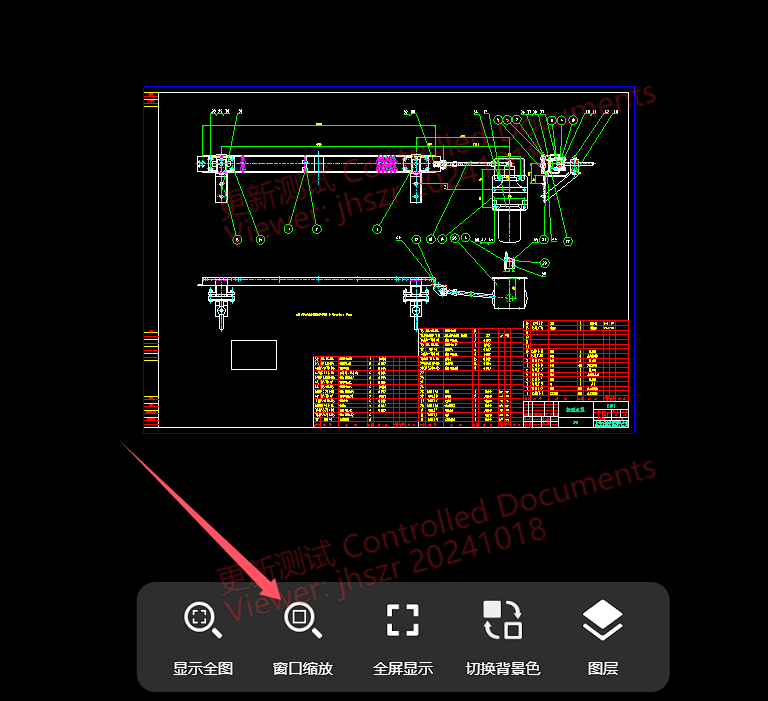
Enter the dwg circle annotation page, and click the full screen display button on the Below toolbar to display the dwg file view in full screen
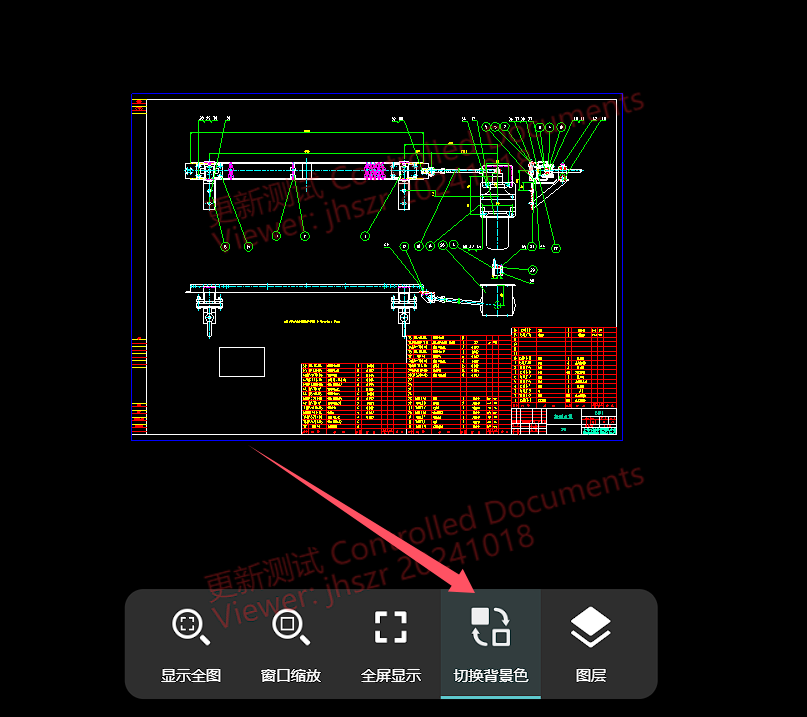
Enter the dwg circle annotation page, click the switch background color button on the Below toolbar to switch the circle annotation background color
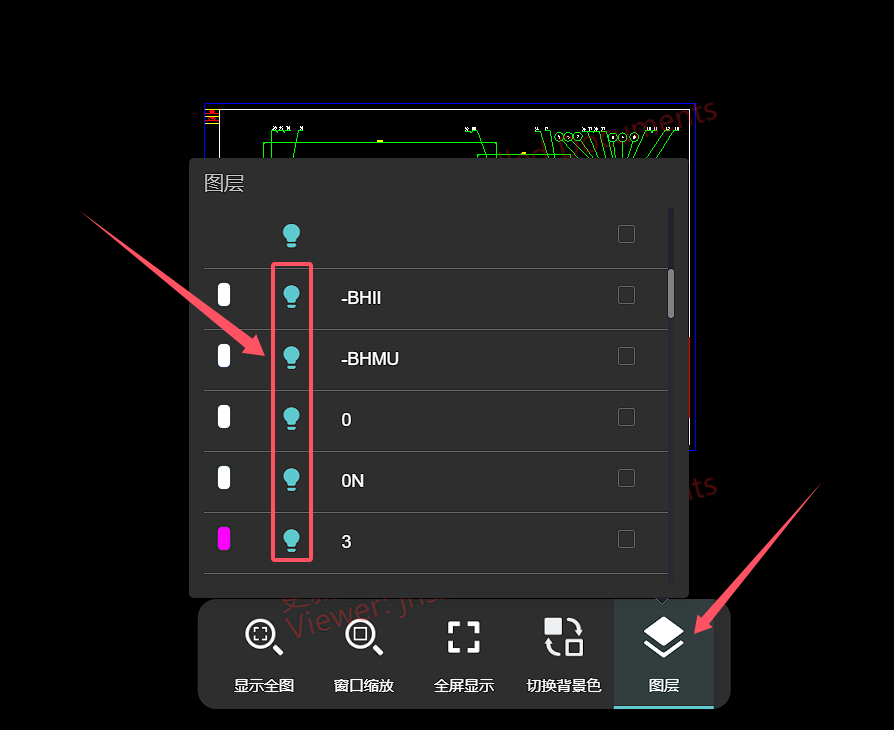
Enter the dwg circle annotation page, click the layer button on the Below side to pop up the layer list, click the layer button, and the dwg preview view will display the corresponding element
Enter the DWG circle review annotation page, click the directory frame button in the upper right corner, and a directory frame pop-up window will pop up on the left side. Click on the directory frame name, and the drawing will jump to the corresponding frame position
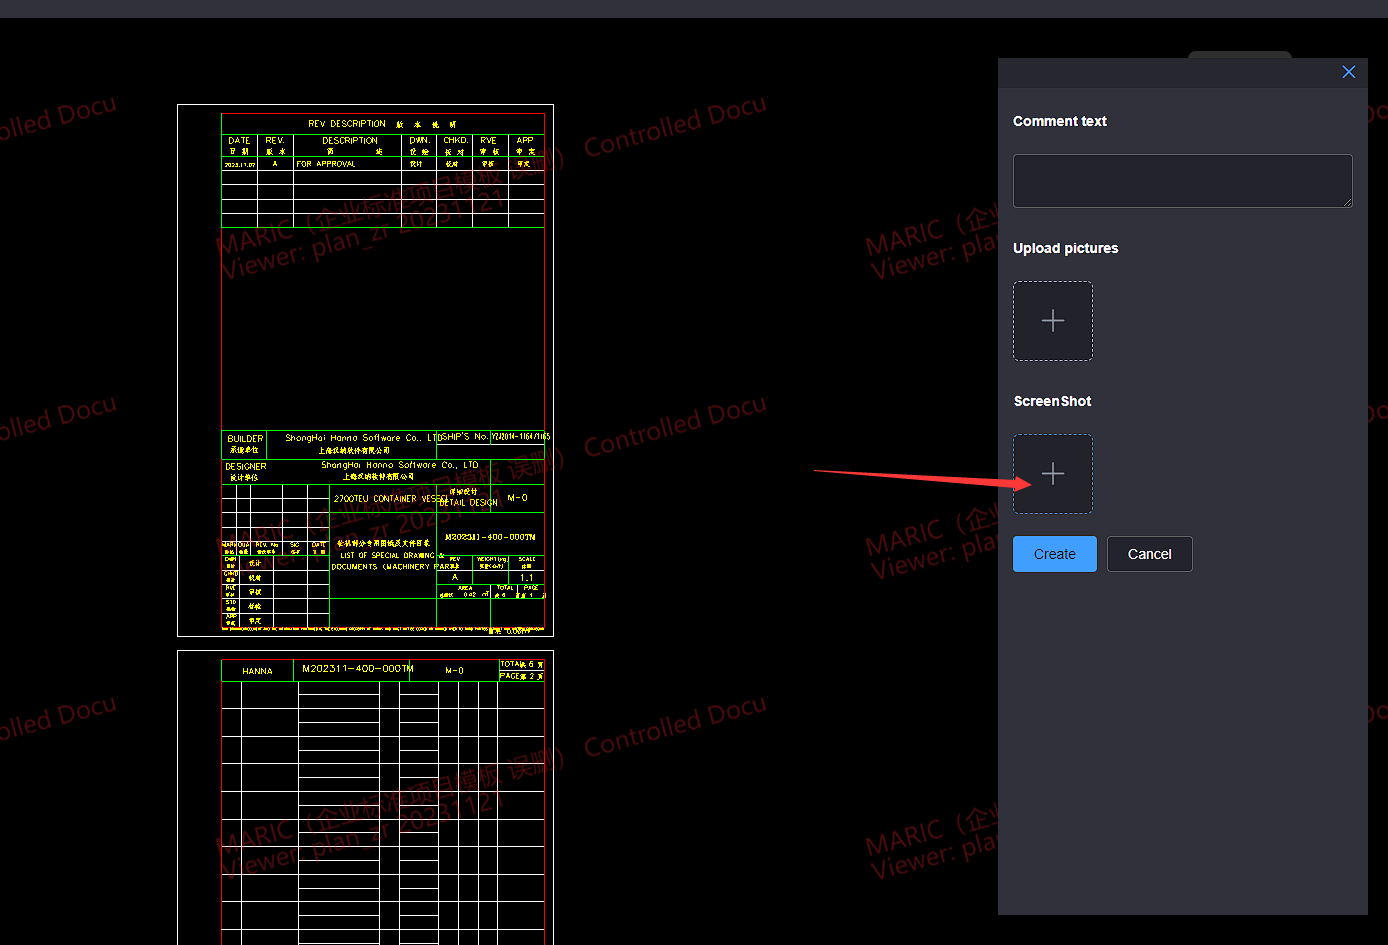
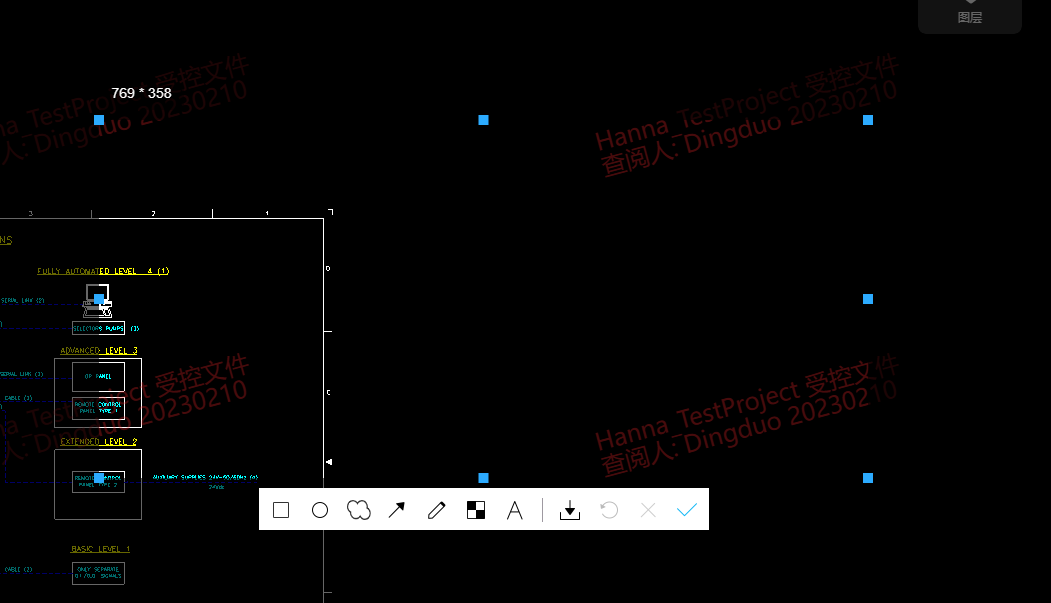
Click the Circle Annotation button at the top right of the circle annotation page to open the Create Annotation interface

In the Create Annotation interface, click the Screenshot button to enter the annotation status
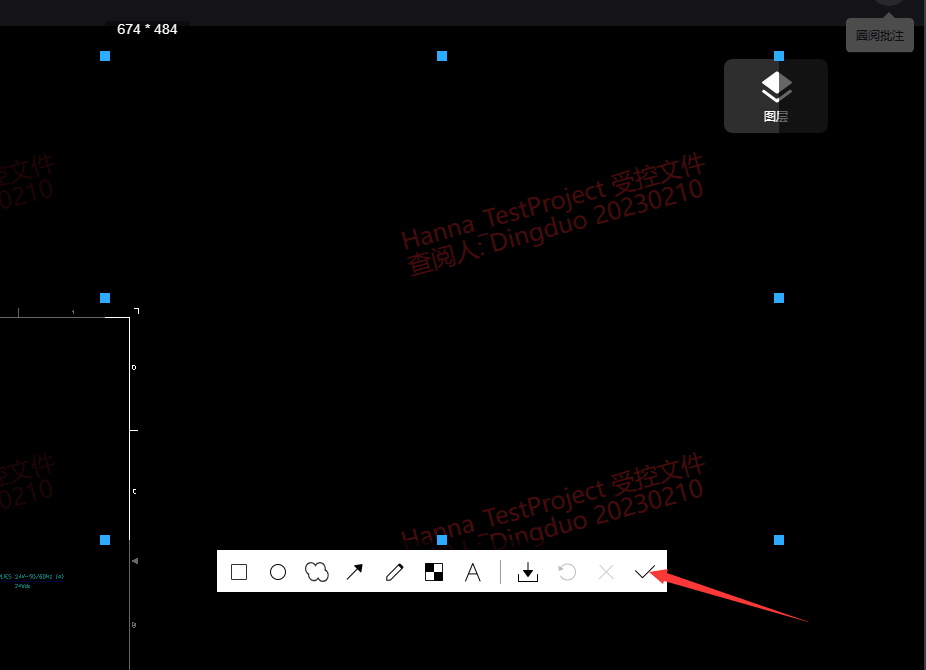
After dragging the mouse to select the circle annotation range, you can select a brush in the lower toolbar to annotate or mark the circle annotation range
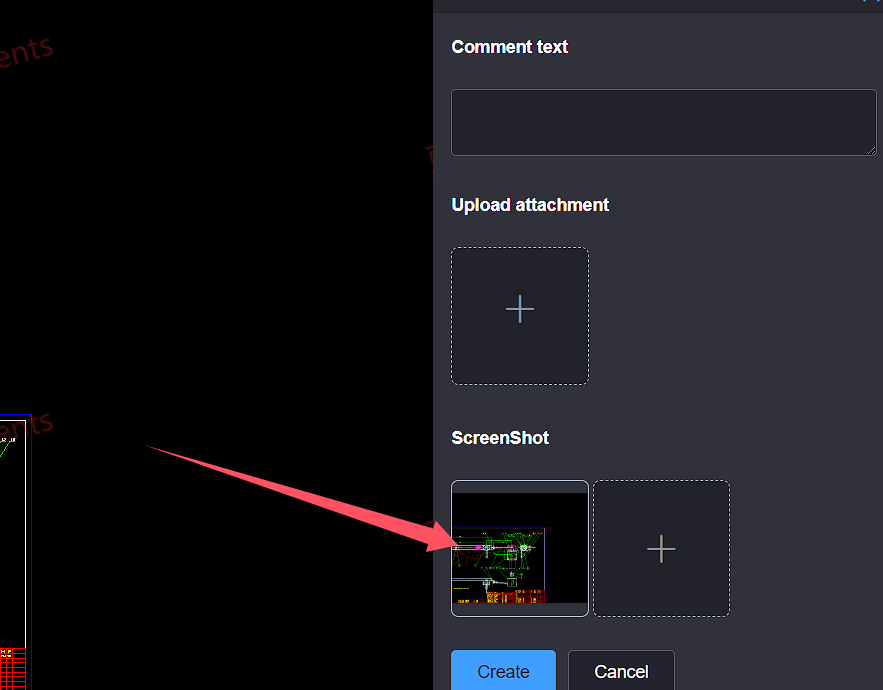
After the annotation mark is completed, You can view annotated images on the annotation creation interface
Click on the Upload Pictures button and select to upload the image or pdf files. You can view the selected uploaded image or pdf files in the Create Annotation interface
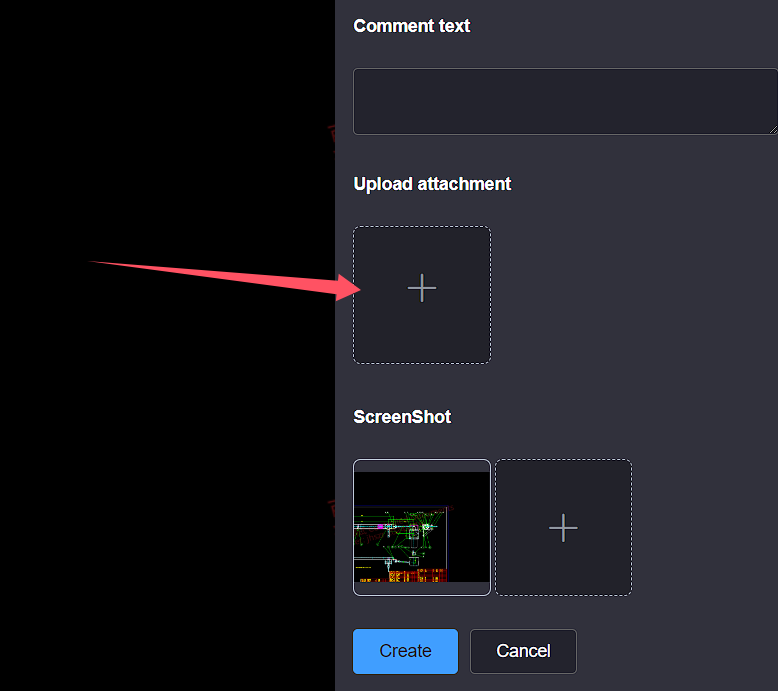
After entering the annotation text, click the Create button and wait for the annotation to be created
When creating annotations, the total number of uploaded images or pdf files or screenshots created cannot exceed 9 and the size cannot exceed 32Mb
# 5.Historical version upload, review, and annotation files
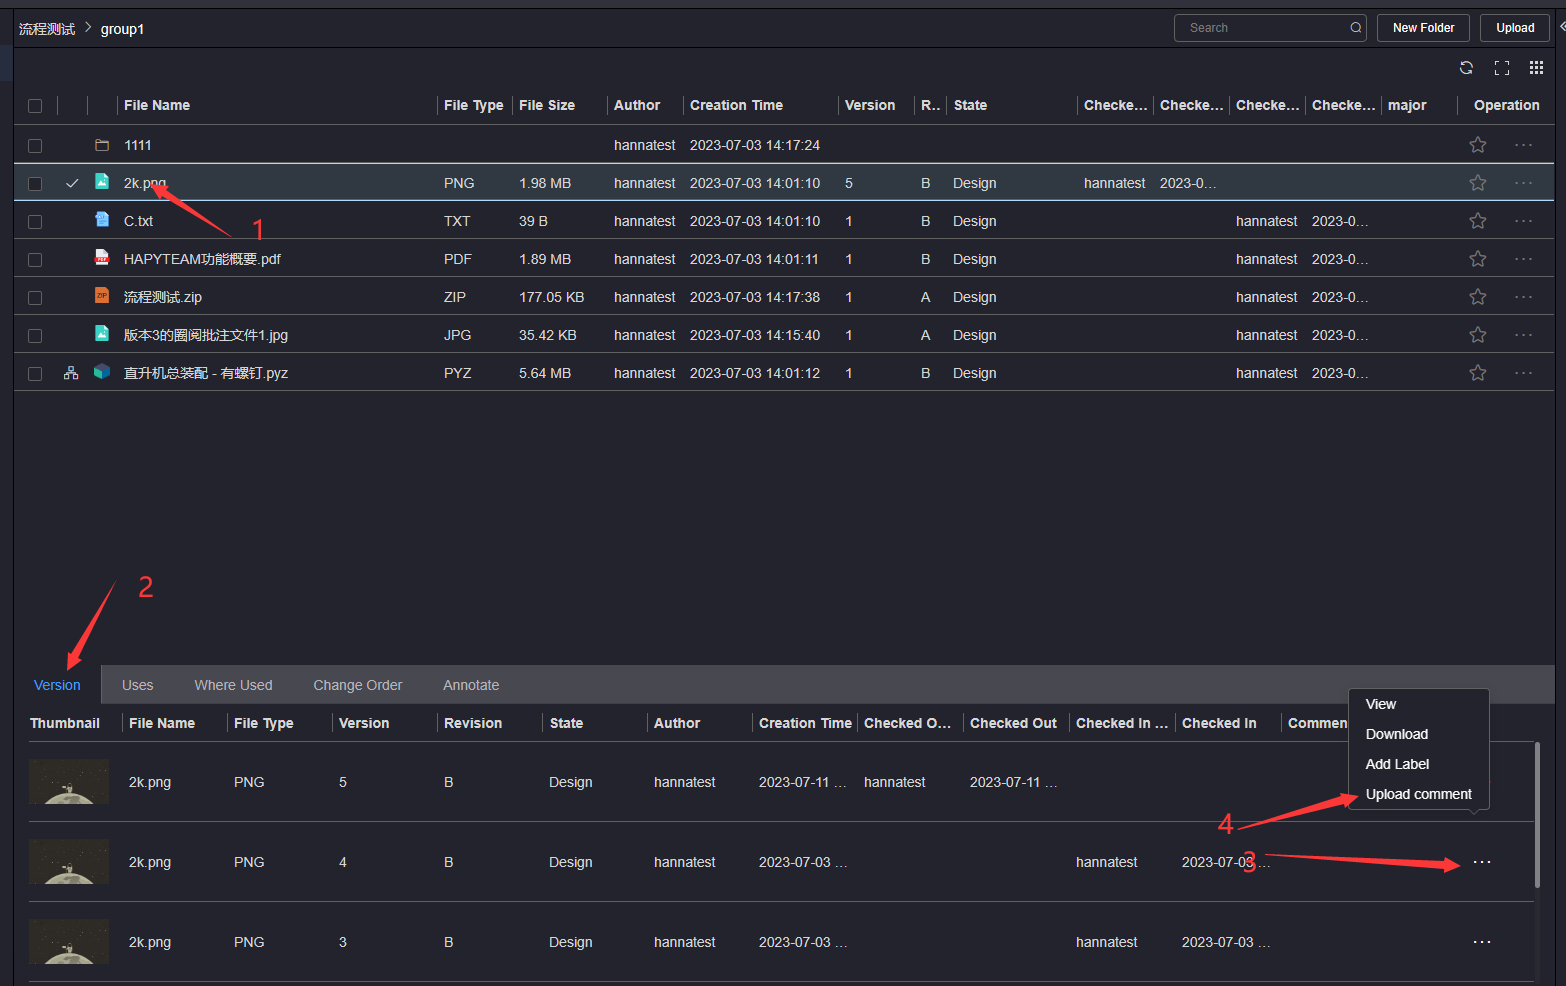
The hapyteam supports uploading annotated files for specified versions of files. Click on the Version tab page below the file list, click on the More Operations button of the version you want to upload annotated files, and click on the Upload Annotations option Enter the upload annotation page
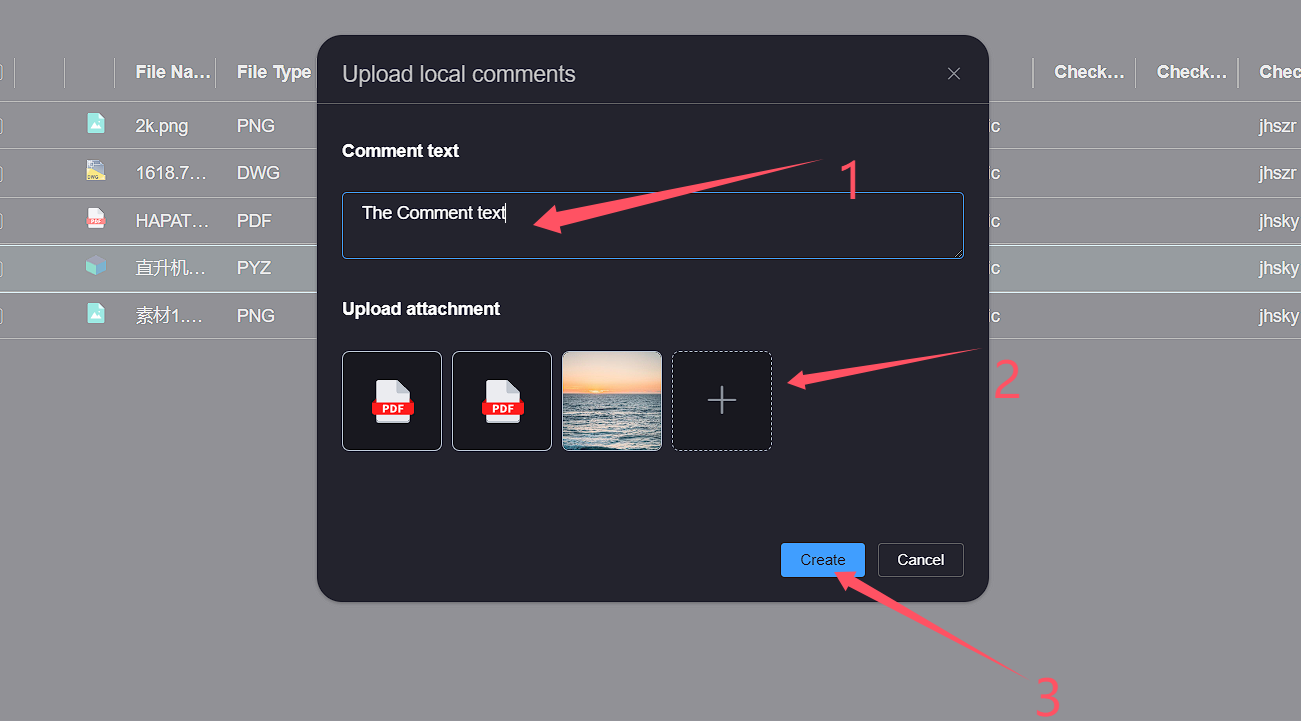
Enter the annotation text, click the Upload attachment button, upload the attachment, then click the Create Annotation button, and wait for the annotation to be created
The uploaded circle annotation file only supports jpg, jpeg, pdf and png
When creating annotations, the total number of uploaded attachment and screenshots created cannot exceed 9
# 6.Annotation List
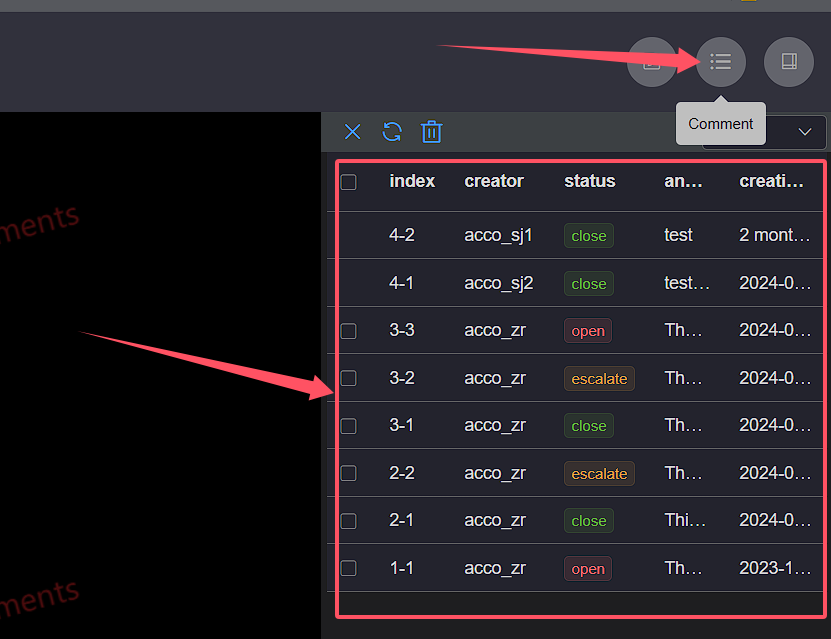
The annotation list is an important function of the annotation module for quick viewing, editing, and commenting on annotation files on the annotation page
On the document review and annotation page, click the Annotation button on the upper right side, and a list of annotations will pop up on the right side
# View annotation files
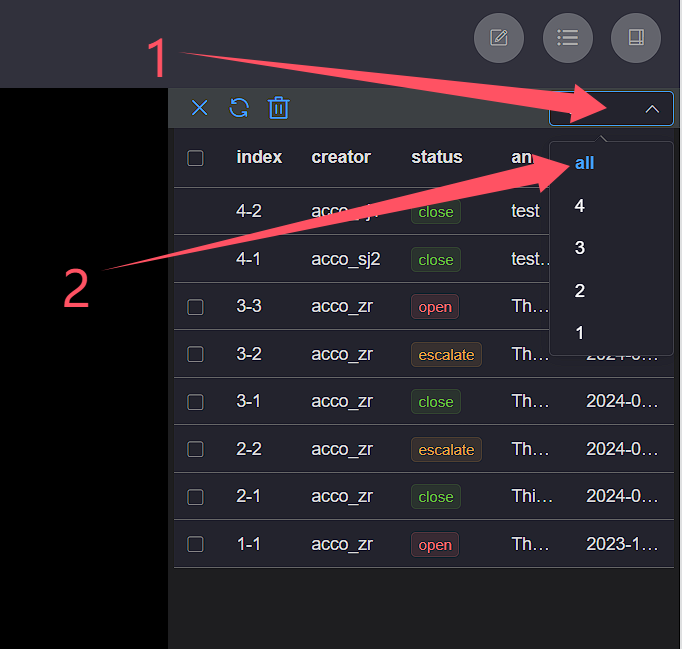
Above the annotation list, click the Version drop-down button, select the corresponding Circle Annotation Version, and the annotation file for that version will be displayed in the annotation list on the bottom side
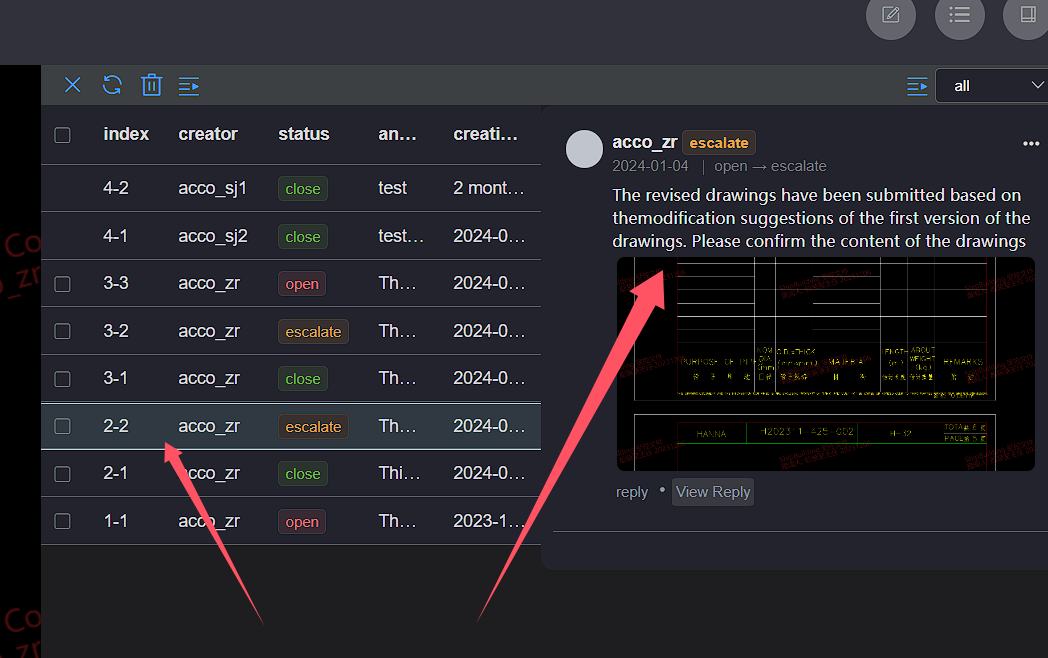
Click on the annotation file name corresponding to the annotation list, and the annotation file details page will pop up on the right
# Edit annotation
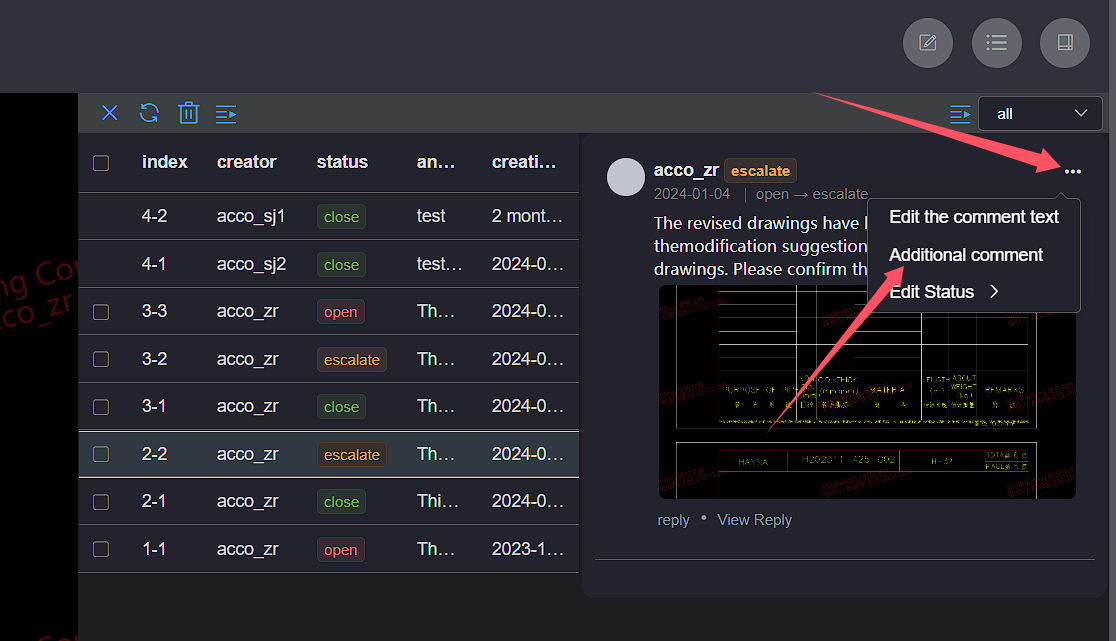
On the annotation file details page, click the Edit Annotation button to pop up the Edit Annotation Text pop-up window
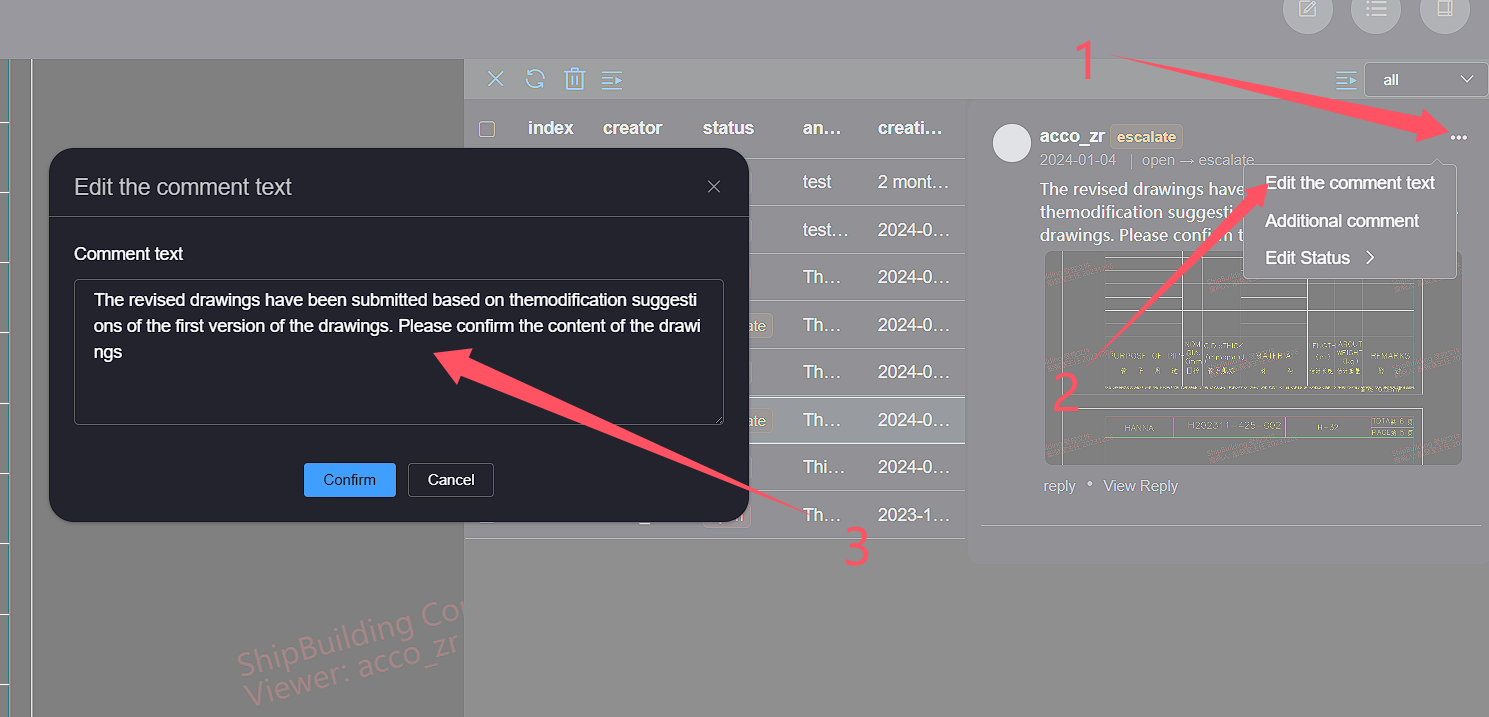
Edit the annotation file, click the confirm button, and wait for the prompt to complete
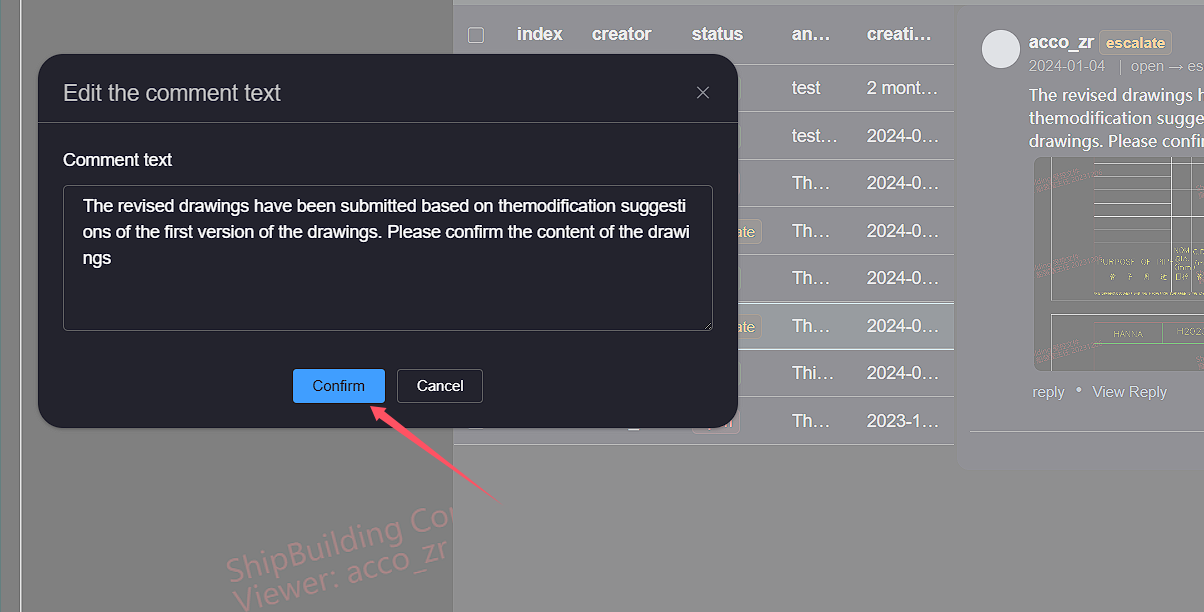
After editing the annotation file, see the edited annotation text on the annotation file details page

# Change status
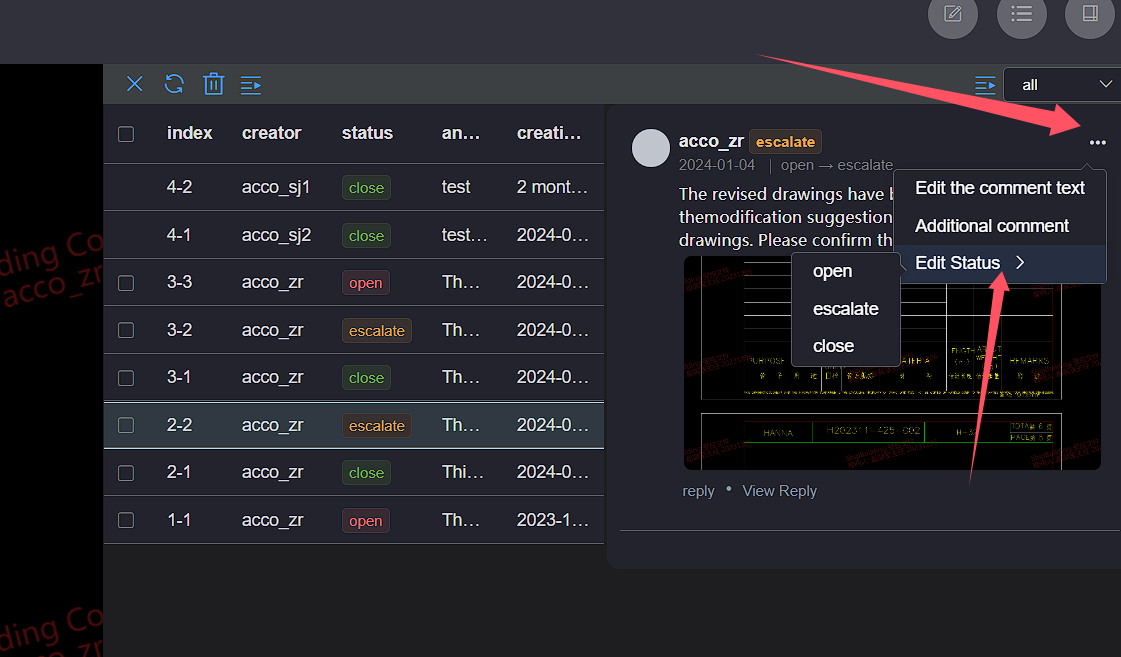
On the annotation file details page, click the Change Status button and select the corresponding status
Only the source file check-in person can set the annotation file status to escalate, and only the author of the annotation file can set the annotation file status to close
# Comment comments
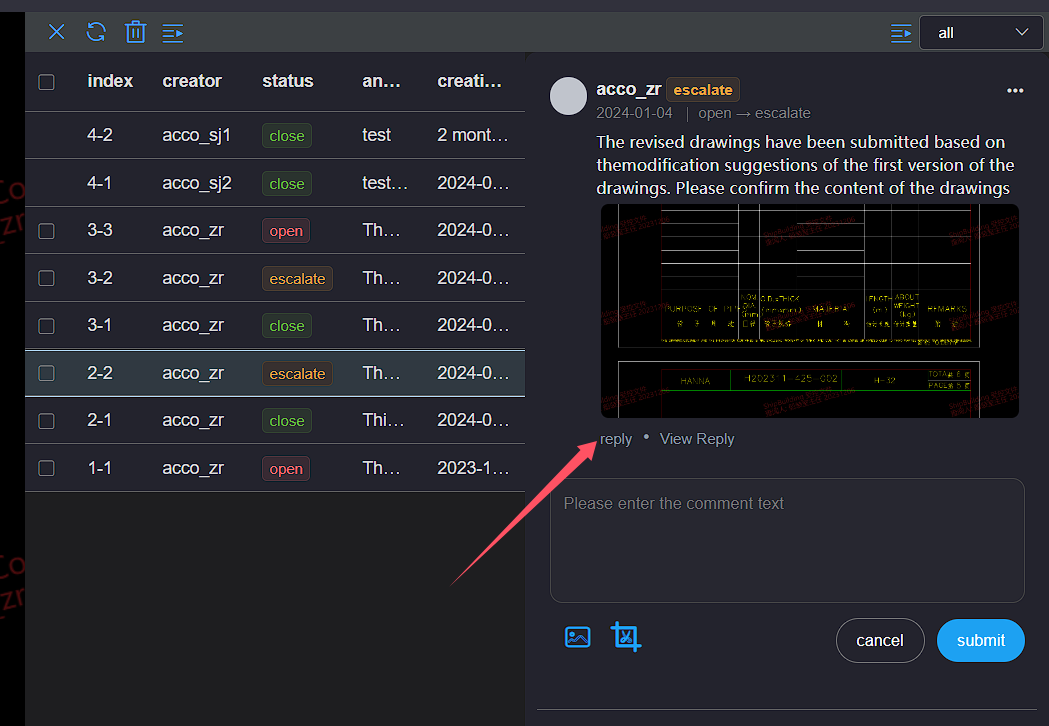
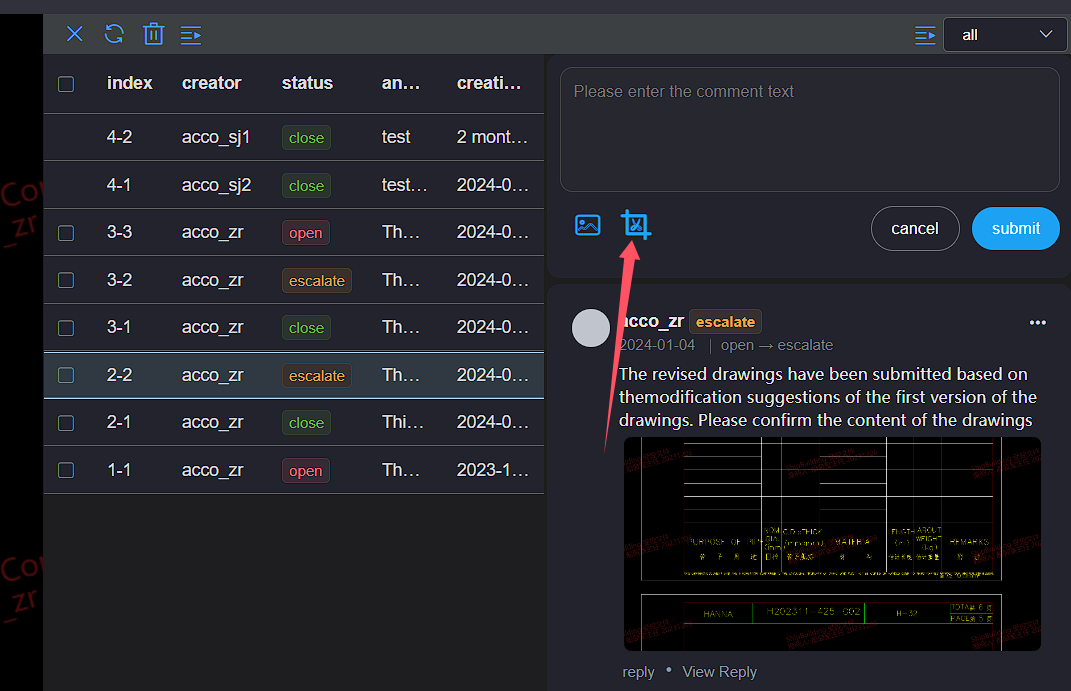
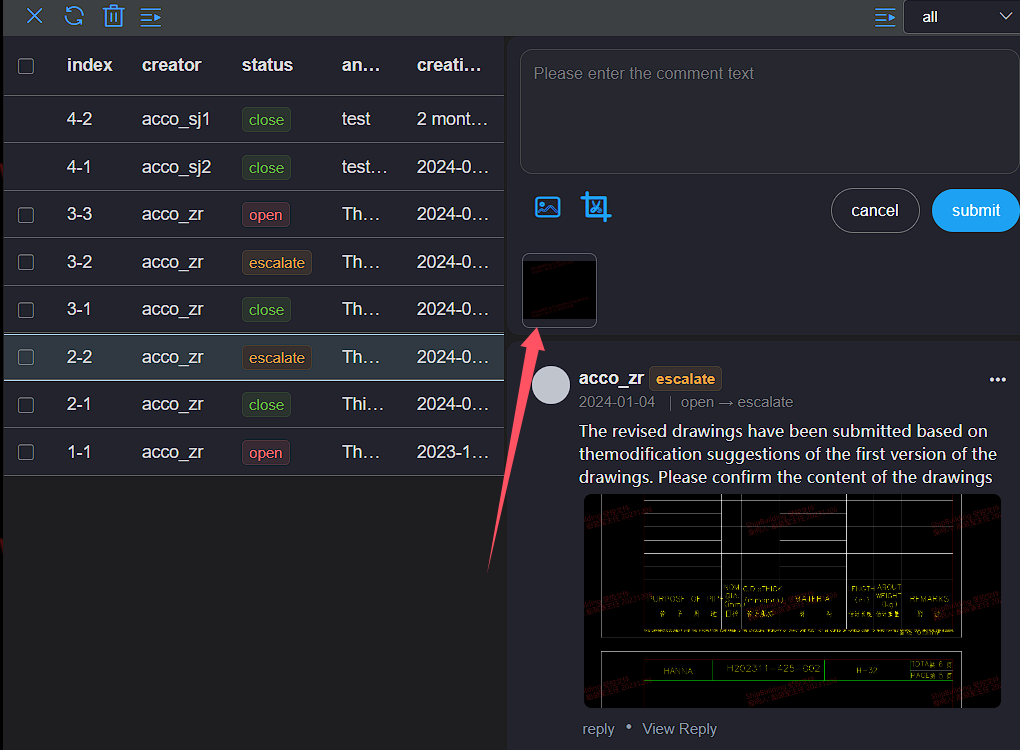
On the annotation file details page, click the Reply button to expand the reply interface below
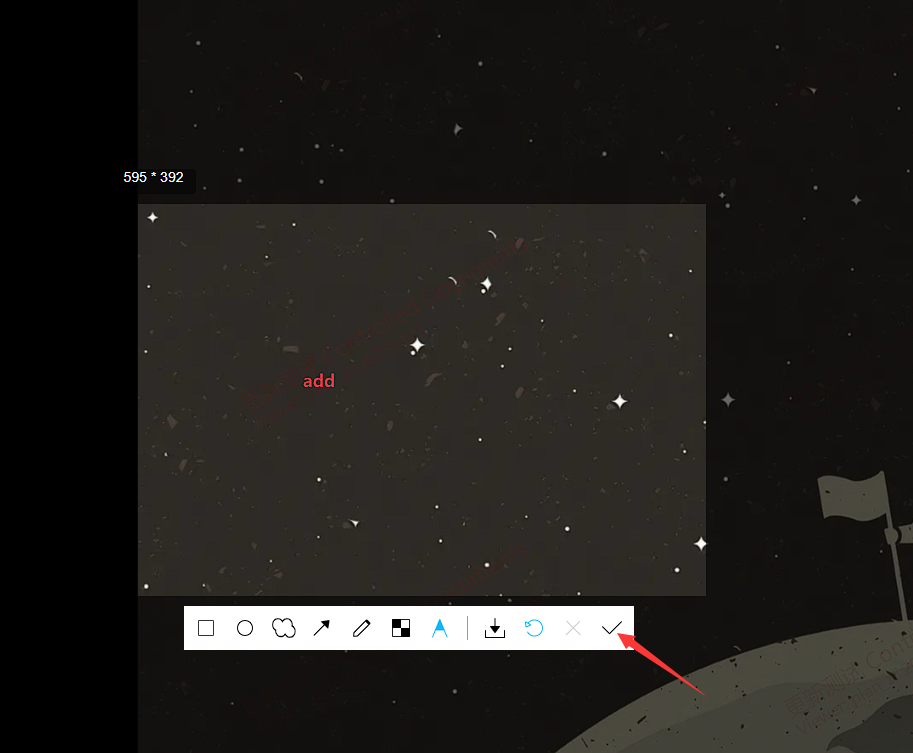
Click on the Screenshot button to enter annotation status
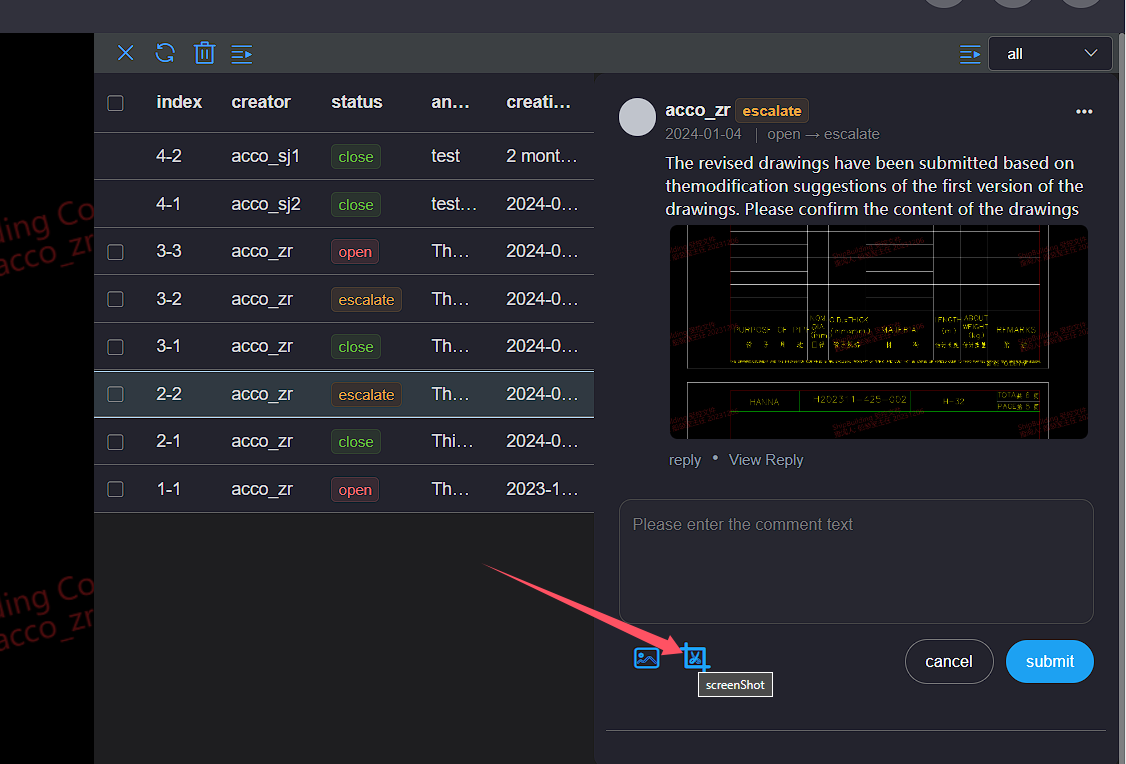
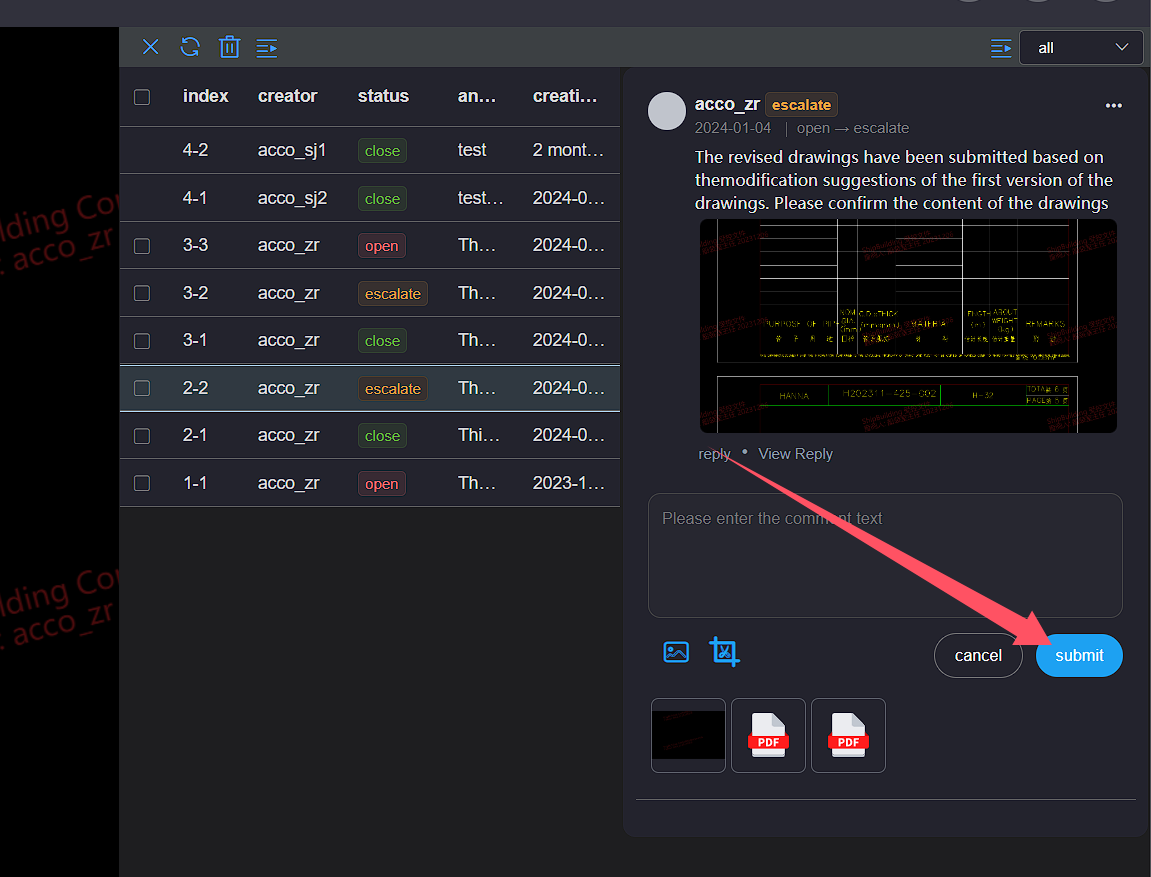
After annotating the file, click the Submit button to view the screenshot image on the reply interface
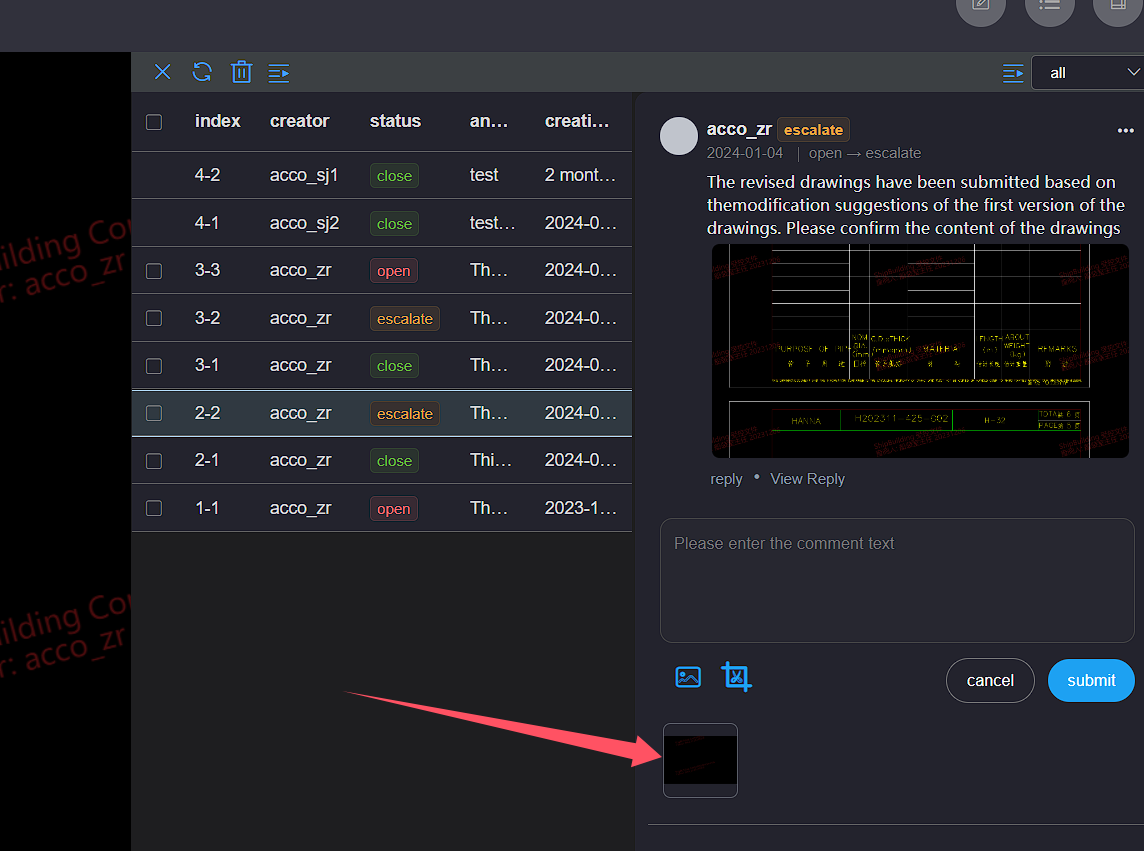
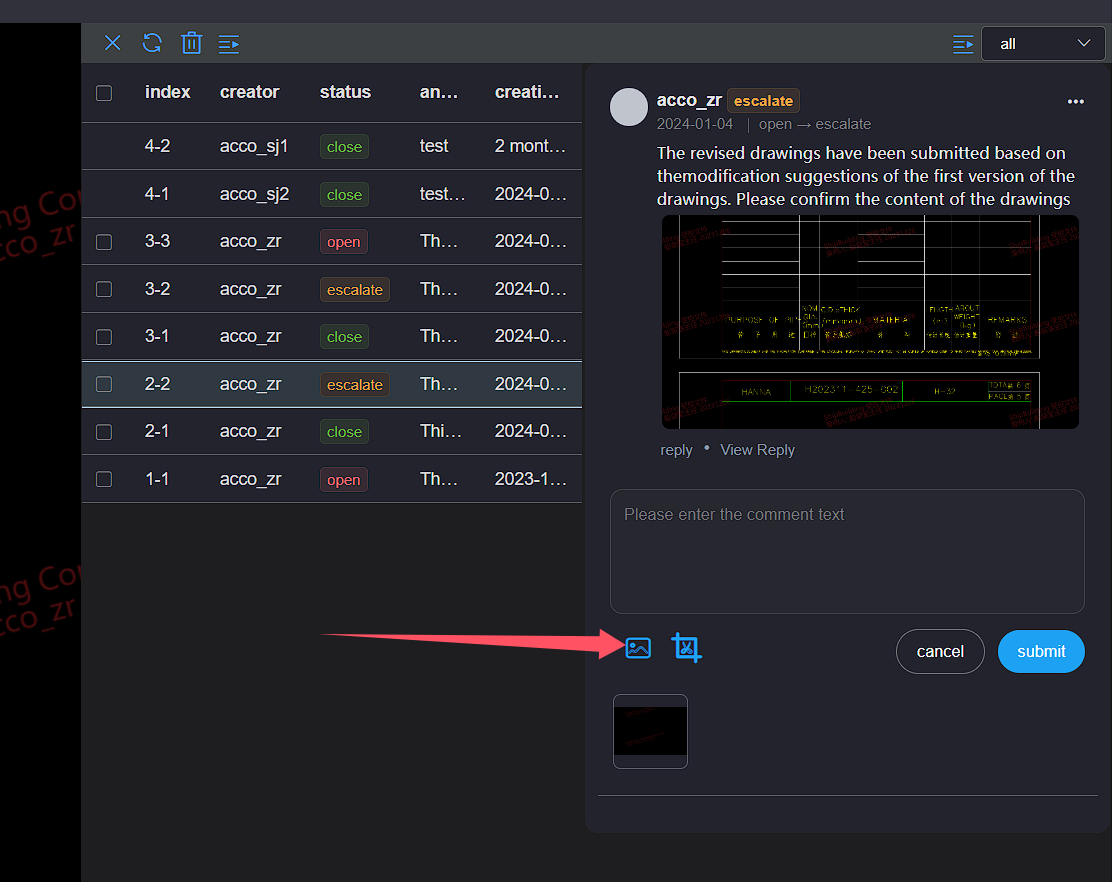
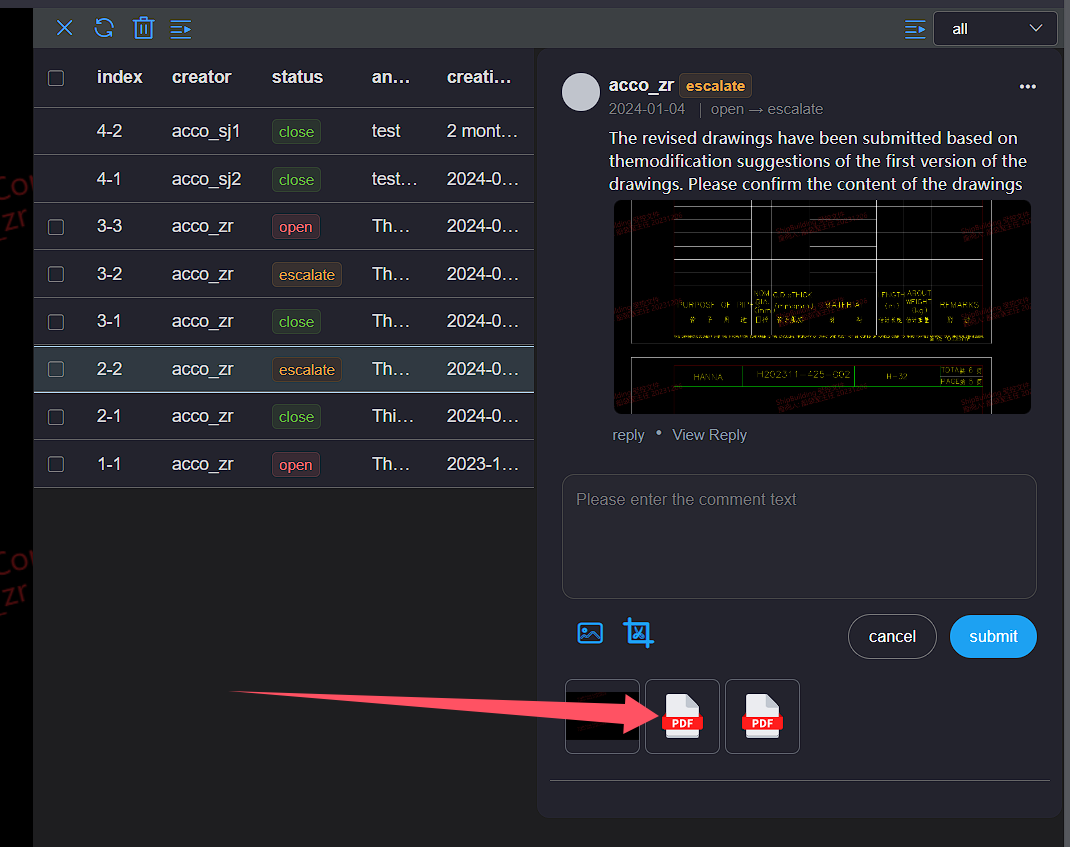
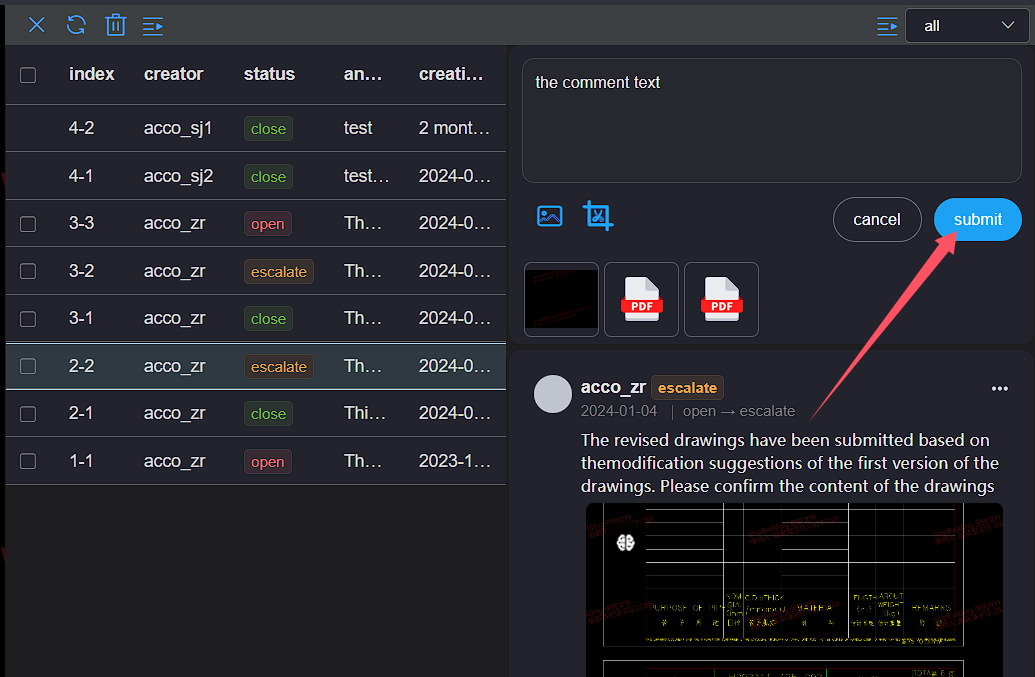
Click the Upload attachment button and select the upload reply file. After uploading, you can view the uploaded attachments in the reply interface
Enter the comment content and click the Submit button to complete the annotation comment
The maximum number of uploaded attachments for replies is 3, and the total size of the attachments cannot exceed 32MB
# Reply to comments
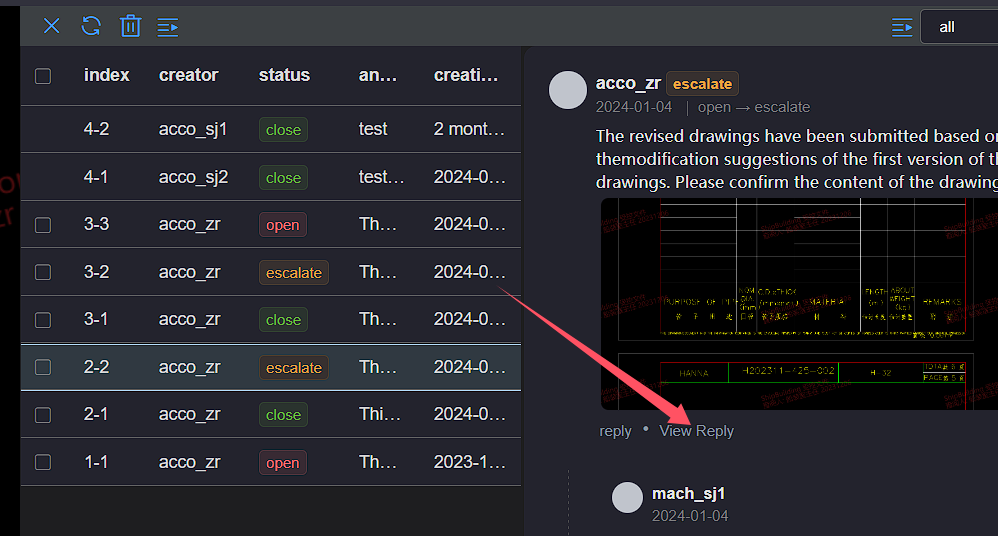
On the annotation file details page, click the View Reply button to expand all annotation comments below
Click the Reply button on the right side of the comment you want to reply to, and the reply interface will automatically expand below

Click on the Screenshot button to enter annotation status
After annotating the file, click the Submit button to view the screenshot image on the reply interface
Click the Upload Pictures button and select the upload reply file. After uploading, you can view the uploaded image in the reply interface


Enter the comment content and click the Submit button to complete the annotation comment
The maximum number of uploaded images for replies is 3, and the total size of the images cannot exceed 32MB
# Delete Comment
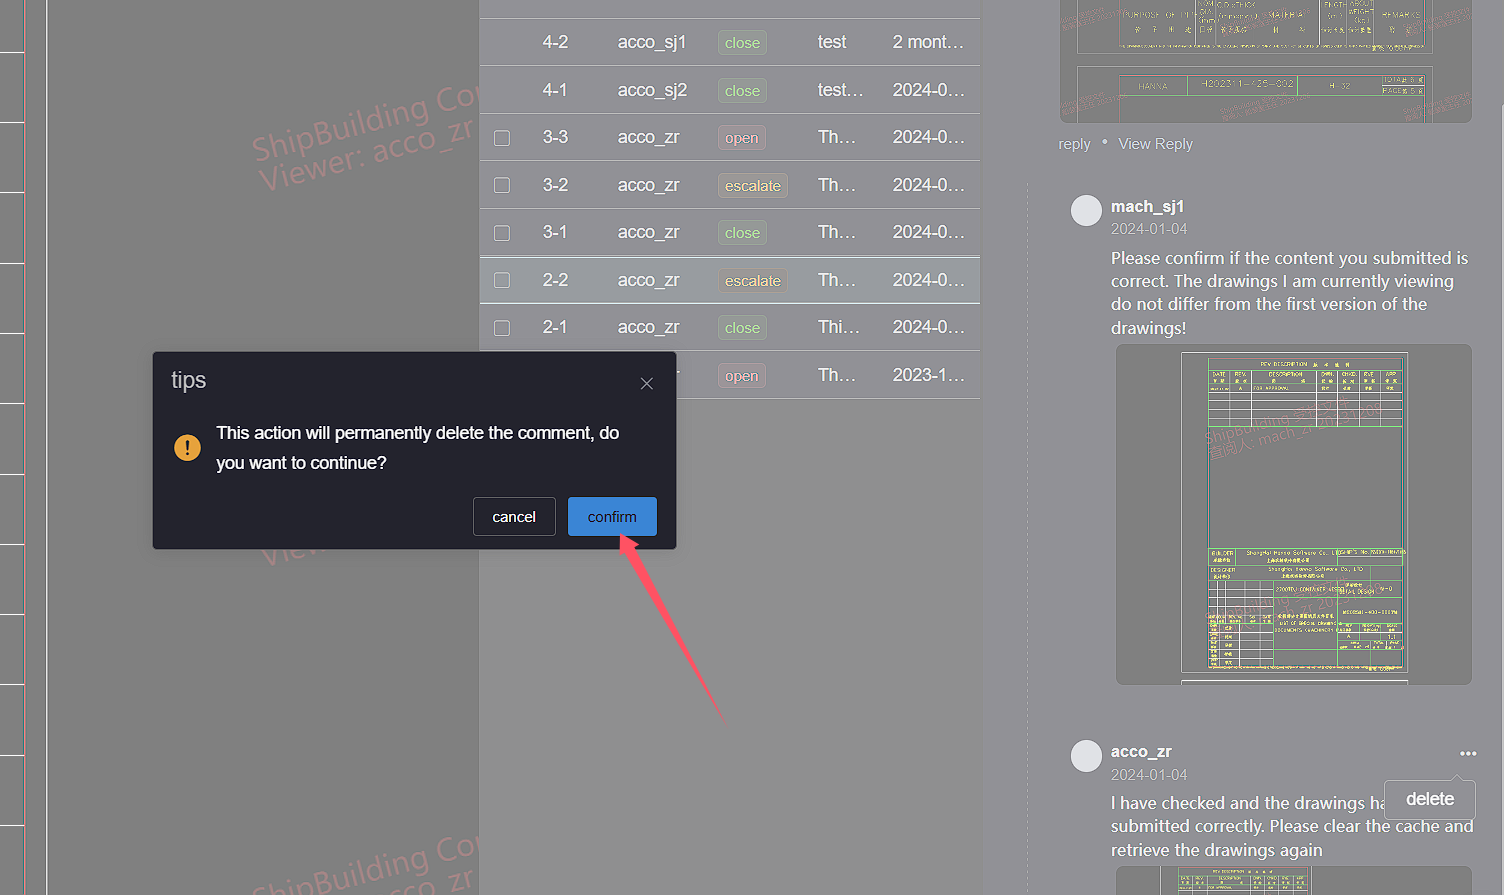
On the annotation file details page, click the View Reply button to expand all annotation comments below
Click the Delete button on the right side of the comment to be deleted, and a deletion confirmation dialog box will pop up. Click the button to delete the comment and its reply content
Only annotated authors and reviewers can delete comments
# 7.Export Annotation File
Click the Export All button or the Export Current button to pop up the Export Circle Annotation pop-up window
Export All as Export all versions of the circle annotation file, Export Current as Export the currently selected version of the circle annotation file
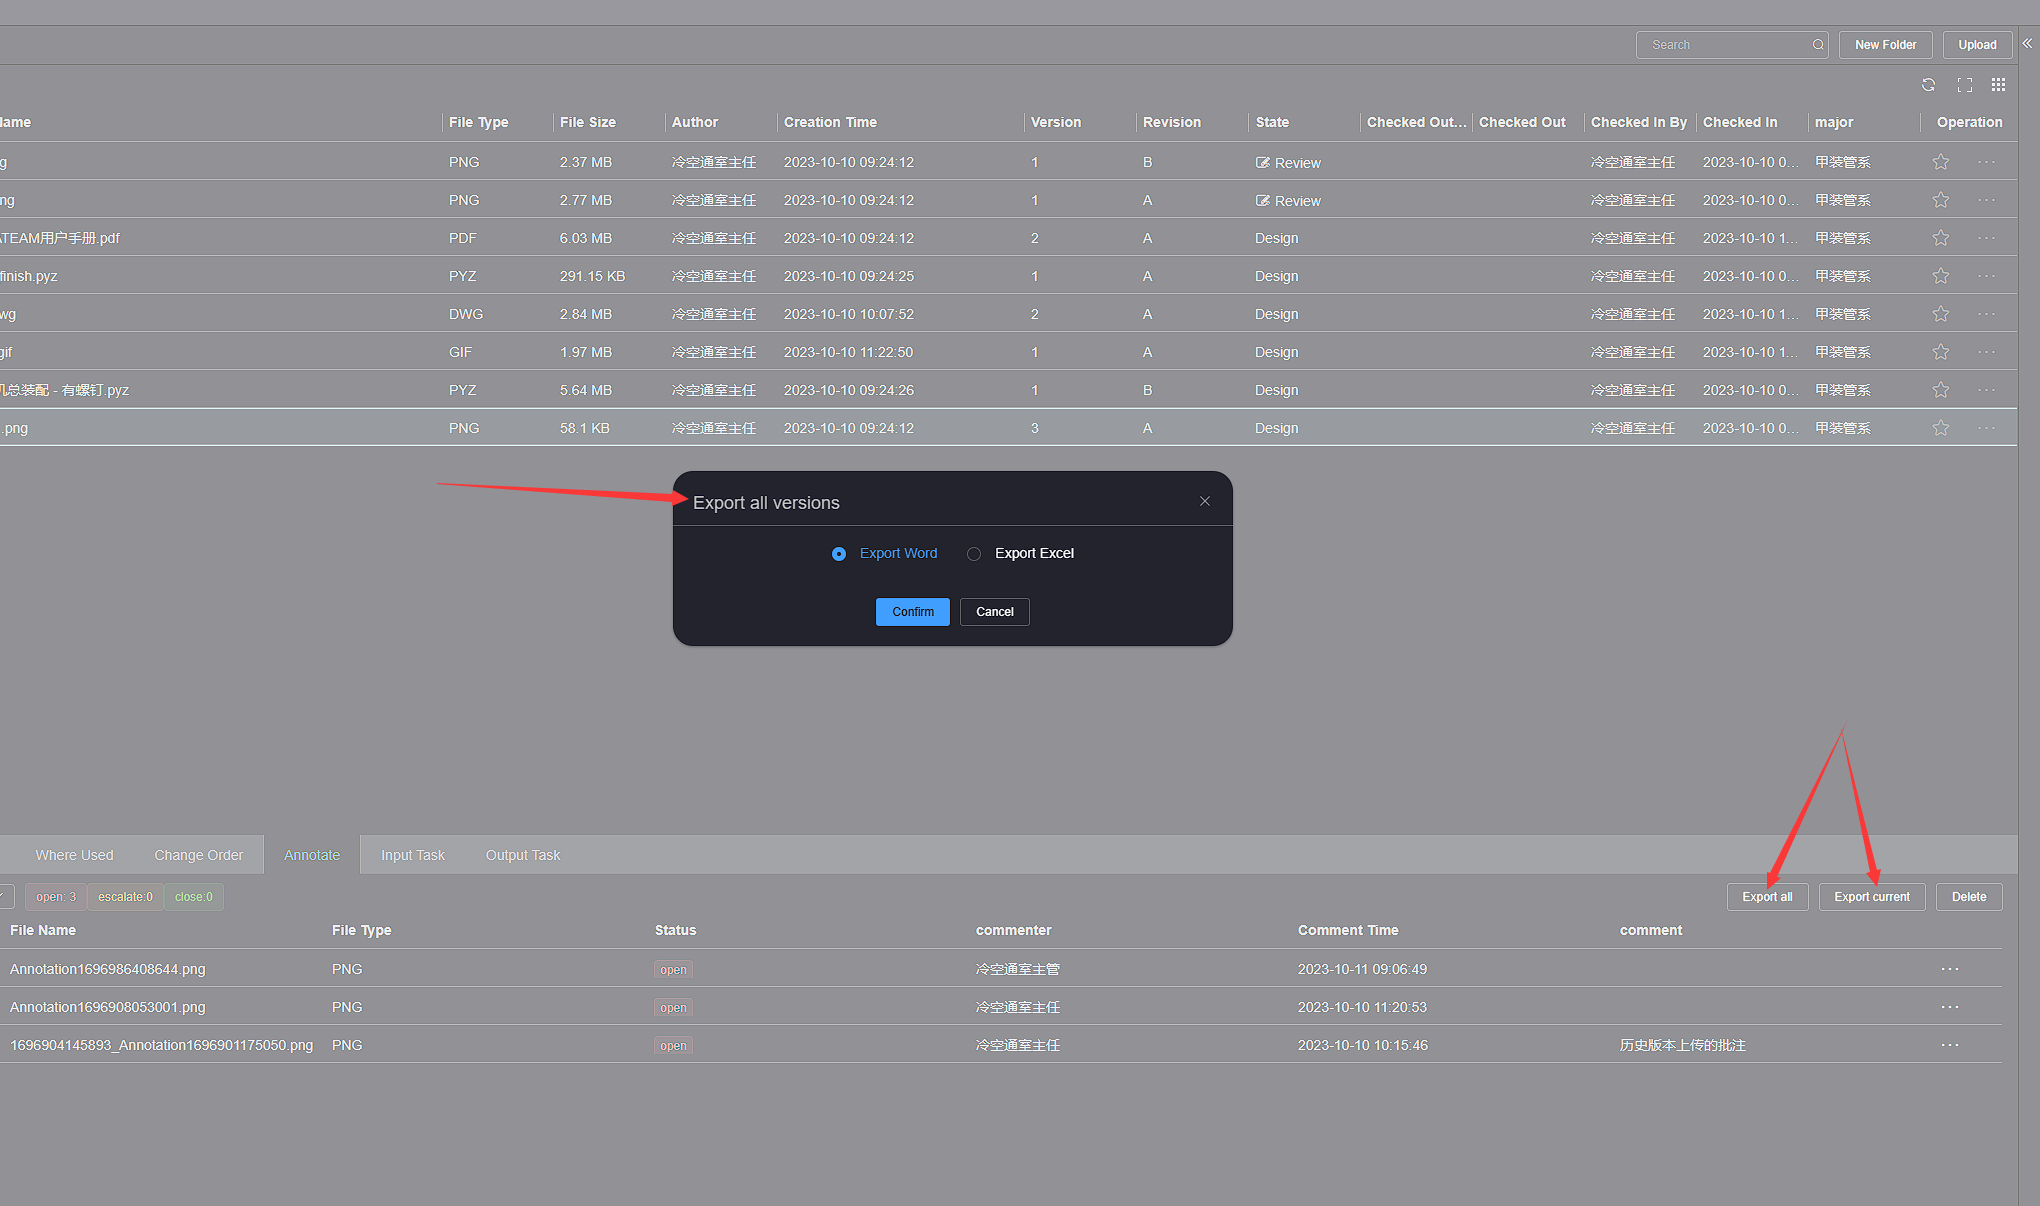
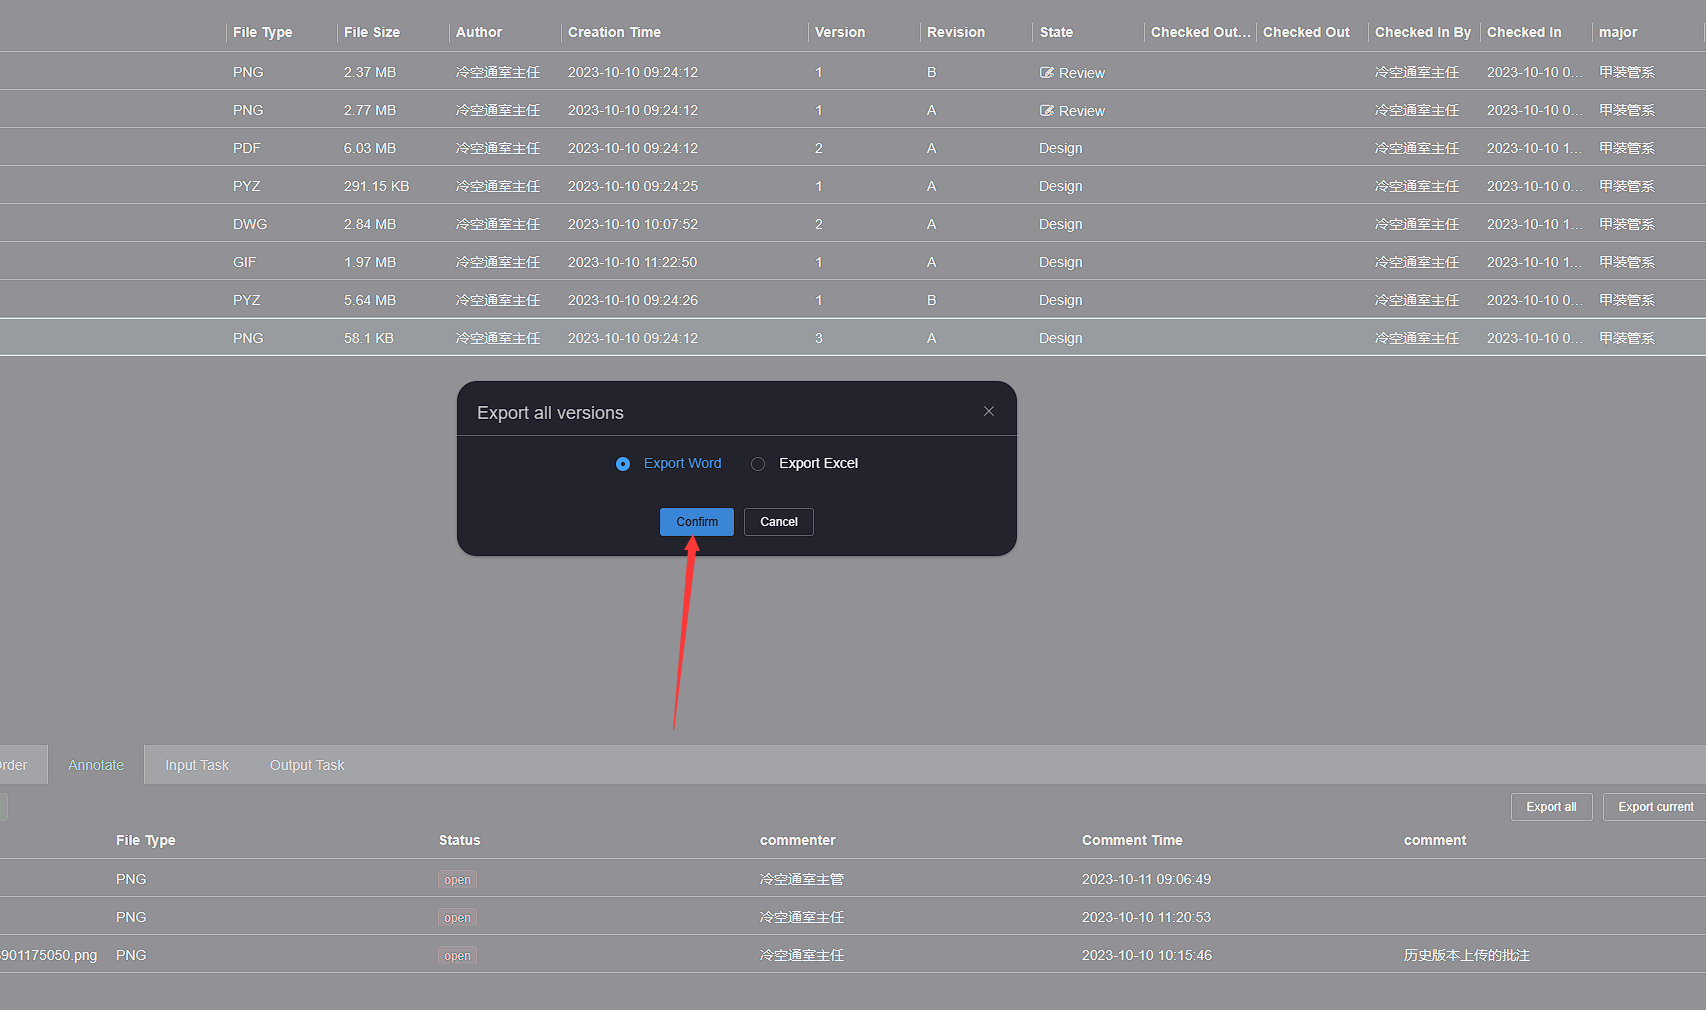
Select the format to export, click the confirm button, and wait for the export file download to complete
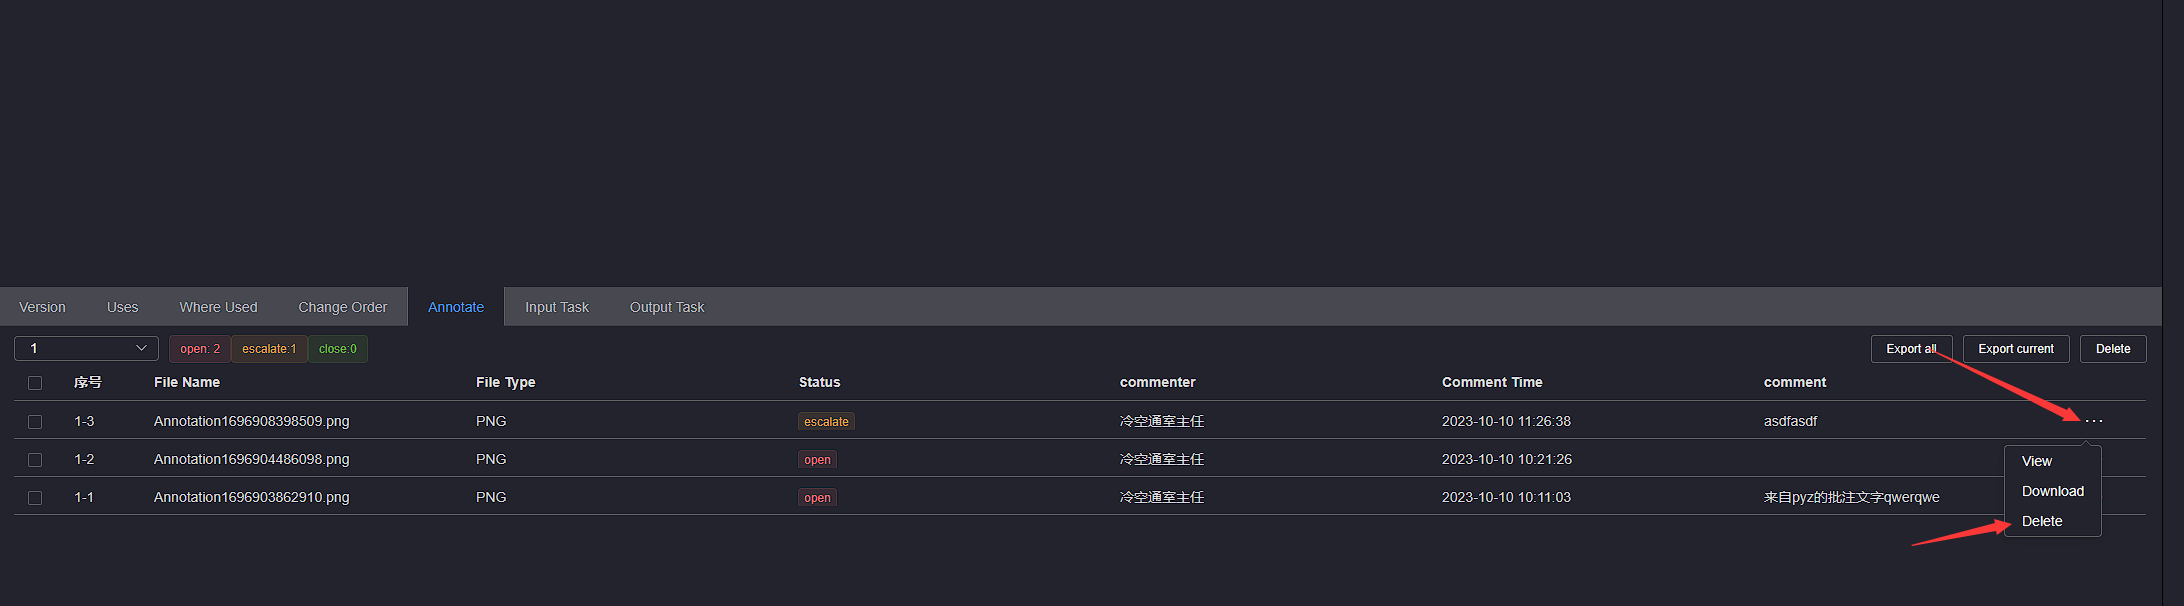
# 8.Delete annotation file
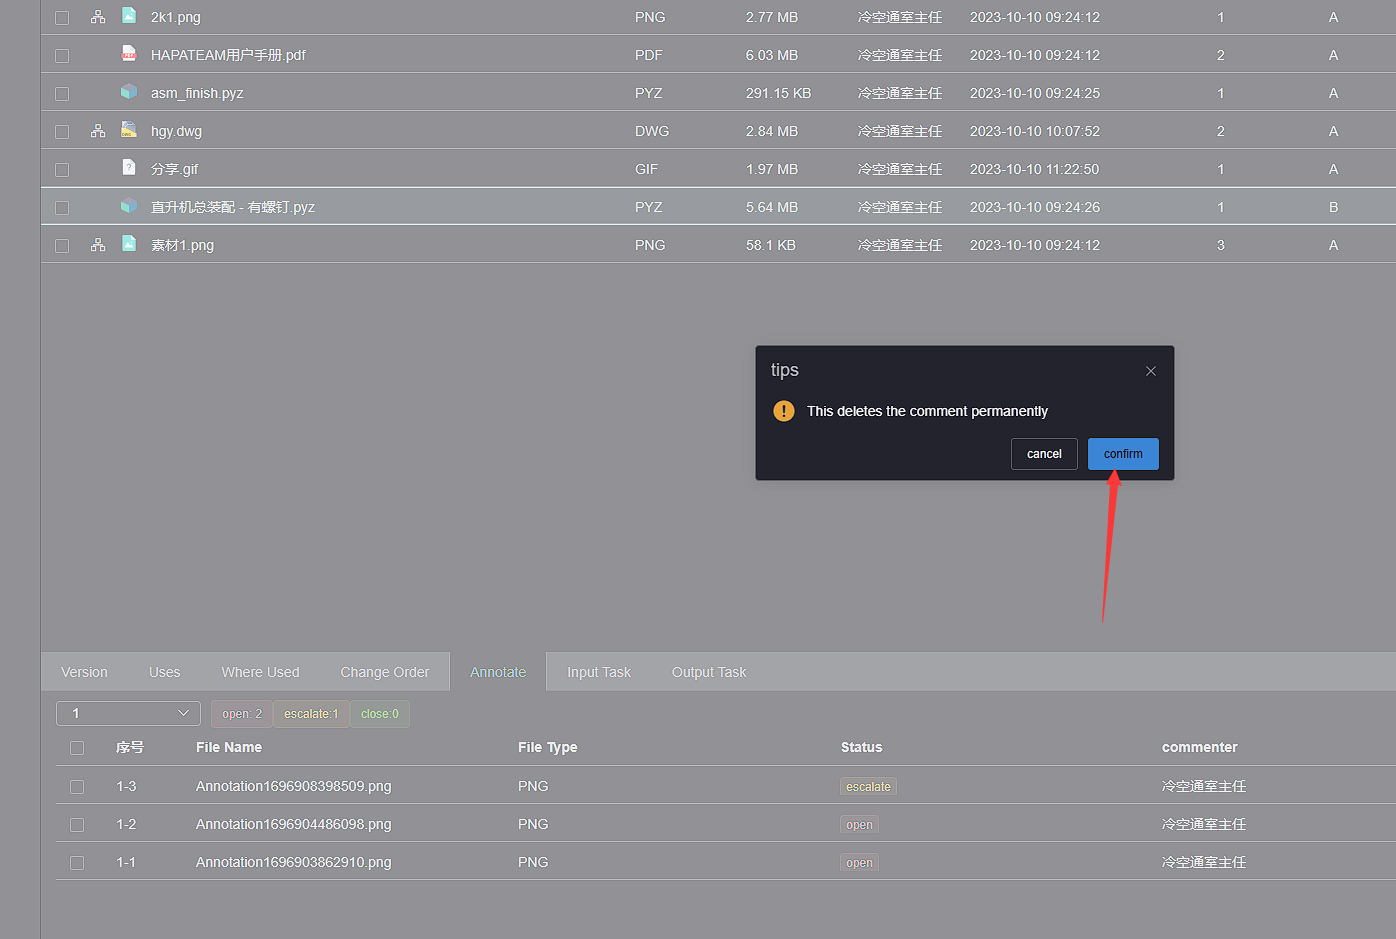
Click on the More operation button on the right side of the annotation file you want to delete, and click on the Delete button
The deletion confirmation dialog box pops up, click the confirm button, and the deletion is complete
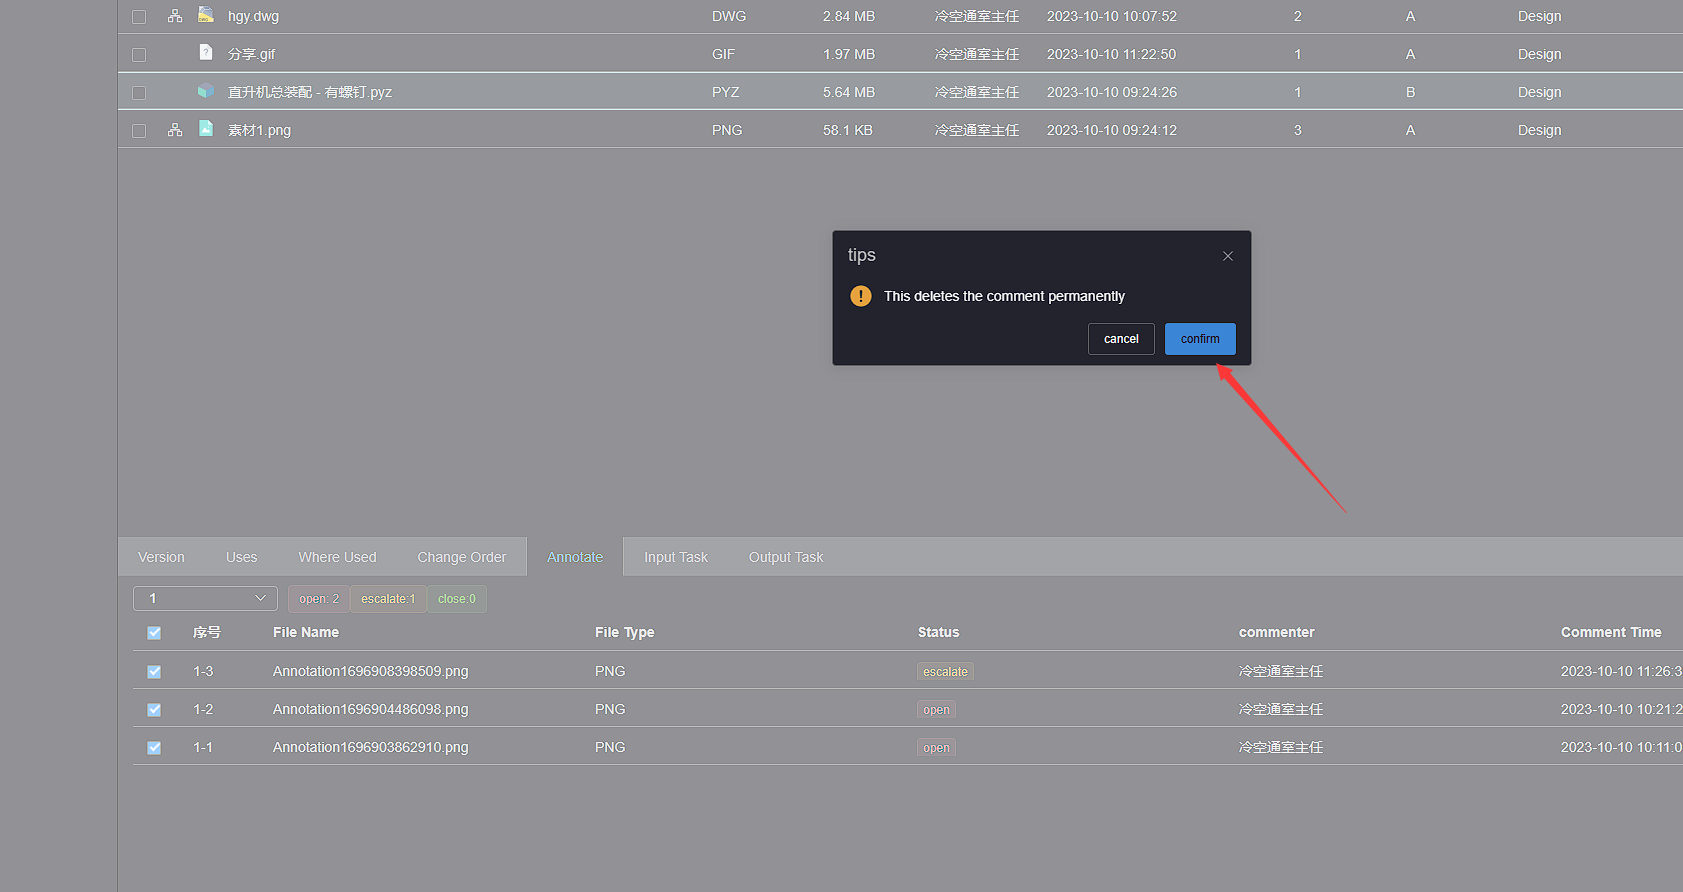
Click to check the checkbox of the comment to be deleted, and click the Delete button in the upper right corner of the comment tab
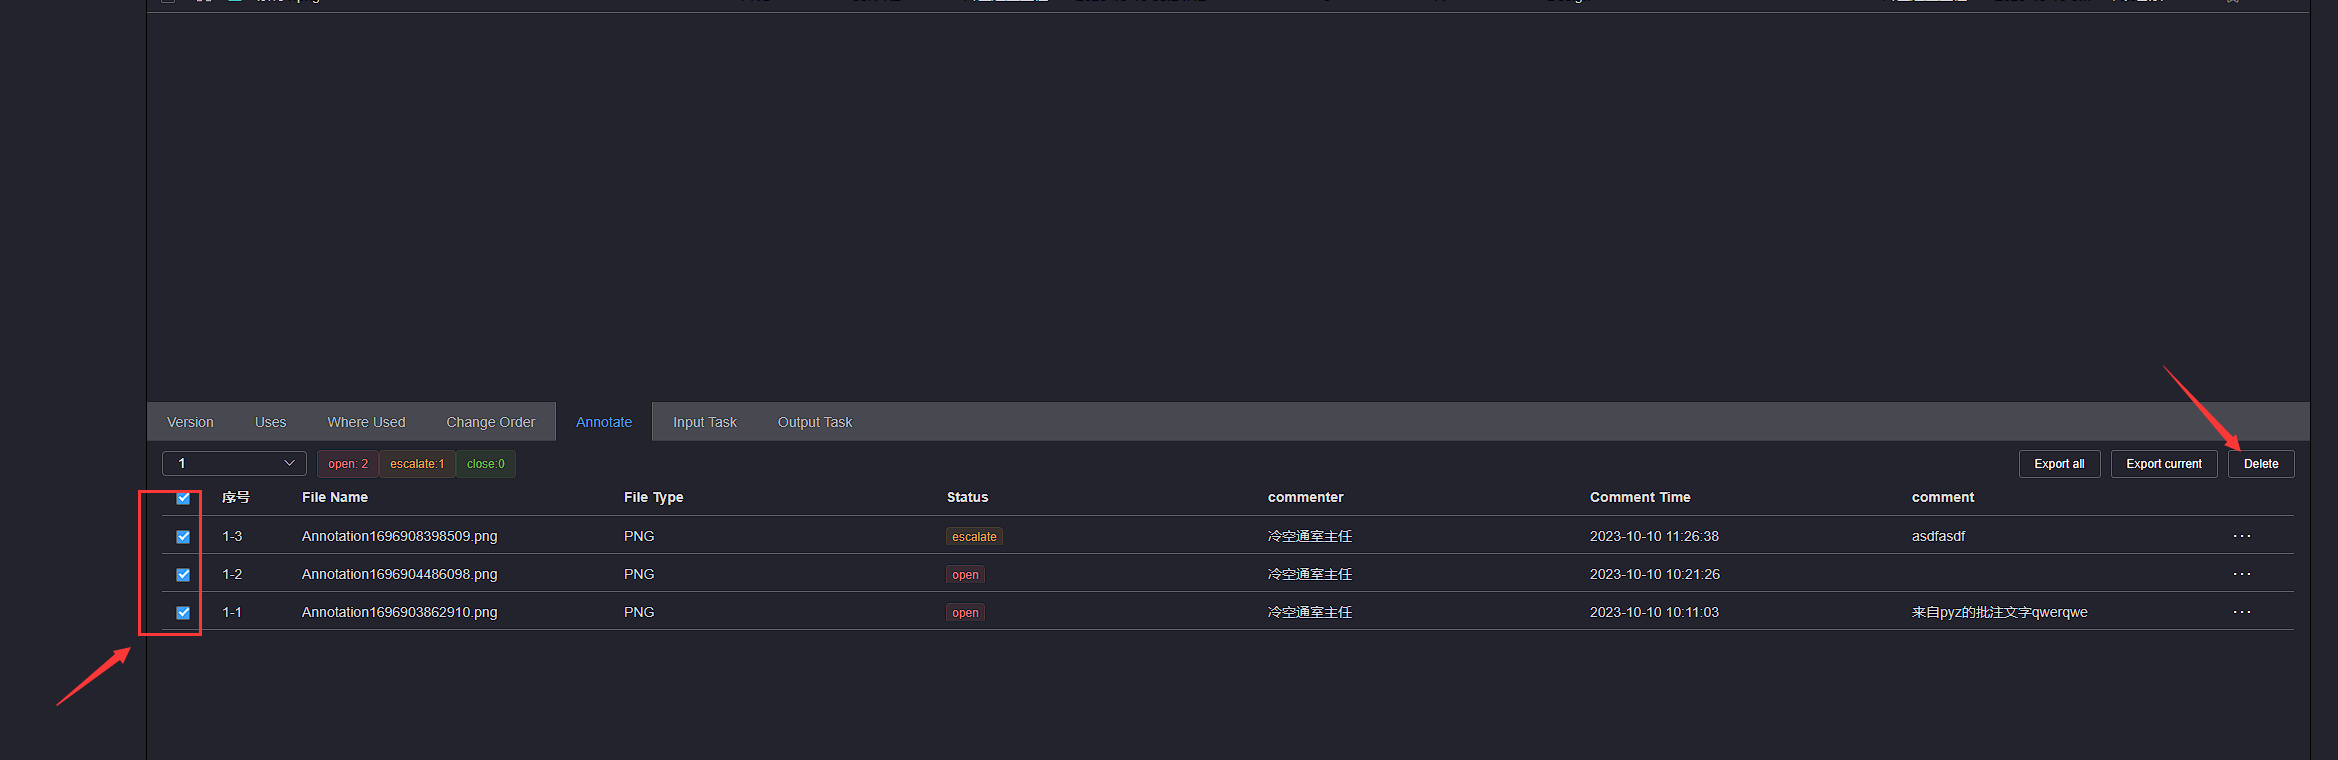
The deletion confirmation dialog box pops up, click the confirm button, and the deletion is complete
← Move files Check In →